- KitchenIQ 50009 Edge Grip 2-Stage
- Smith’s Abrasives PP1
- AccuSharp Knife & Tool Sharpener
- Lansky PS-MED01 BladeMedic
- Presto 08800 EverSharp Electric
- Work Sharp WSEDCPVT EDC Pivot
- Smith’s CCKS 2-Step
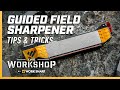
- Work Sharp Guided Field Sharpener
- Lansky QuadSharp QSHARP
- SHARPAL 181N Dual-Grit Diamond
- Work Sharp – WSCMB Combo
TOP #1
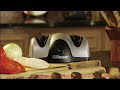
KitchenIQ 50009 Edge Grip 2-Stage backpacking knife sharpener
- Coarse for dull and damaged knives
- Fine for polishing the knife and for quick touch-ups for an already sharp knife
- Patented Edge Grip feature allows sharpening on the edge of the table or counter top- prevents the tip of larger knives from dragging over the surface of the counter
- Compact for easy storage.
- backpacking knife sharpener
|
TOP #2
Smith’s Abrasives PP1 backpacking knife sharpener
- Tapered Round Diamond Coated Rod for Sharpening Serrated and Standard Edges
- Carbide Blades (Coarse CARBIDE Slot) Quickly Set Your Edge; Ceramic Stones (Fine CERAMIC slot) Give You a Razor Sharp Edge
- Reversible and Replaceable Carbide and Ceramic Stones for Extended Sharpening
- Lanyard hole for Carrying
- Preset Sharpening Angles provide Guaranteed Results
- backpacking knife sharpener
|
TOP #3
AccuSharp Knife & Tool Sharpener backpacking knife sharpener
- Sharpening blades are diamond-honed tungsten carbide and provide years of reliable use
- Full length finger guard protects your fingers
- Will not rust and can be cleaned with soap and water, or in the dishwasher
- Sharpening blades are reversible so you get double the life from your sharpener and replacement sharpening blades are available
- Lifetime Warranty. Made in the USA.
- backpacking knife sharpener
|
TOP #4
Lansky PS-MED01 BladeMedic backpacking knife sharpener
- Imported
- Field repairs on all blades
- Works with standard, serrated, gut hook, and fillet knives
- Carbide, ceramic, and diamond sharpeners
- Tungsten Carbide-Three Or Four Strokes Will Restore Your Blade
- Ceramic Sharpening Rods-Polist To A Finished Edge In Three Or Four Strokes
- Serrated Knife Sharpener-Designed To Get Inside Even The Smallest Serrations
- backpacking knife sharpener
|
TOP #5
Presto 08800 EverSharp Electric backpacking knife sharpener
- The product is electric knife sharpener
- Easy to use
- The product is manufactured in China
- A two-stage sharpening system
- No guess sharpening
- Creates a razor-sharp edge
- Stage 1- precision grinding begins the sharpening process by creating a precisely angled edge
- backpacking knife sharpener
|
TOP #6
Work Sharp WSEDCPVT EDC Pivot backpacking knife sharpener
- Convex-carbide
- Controlled sharpening
- Ceramic hone – hones/ re-sharpens any blade steel quickly and easily with just a few passes
- Diamond plate – sharpens Fish hooks and a wide range of edge tools
- On the go
- backpacking knife sharpener
|
TOP #7
Smith’s CCKS 2-Step backpacking knife sharpener
- Crossed Carbide Blades Provide Quick Edge Setting
- Crossed Ceramic Rods Provide a Razor Sharp Edge
- Preset Sharpening Angles Provide Guaranteed Results
- Non-Slip Rubber Feet for Added Safety.
- Excellent for use on all types of knives, especially filet knives
- backpacking knife sharpener
|
TOP #8 |
TOP #9 |
TOP #10 |
TOP #11
Work Sharp – WSCMB Combo backpacking knife sharpener
- FAST – a few passes through the sharpener puts a sharp edge on your blade
- CONSISTENT
- VERSATILE
- ABRASIVE BELTS & CERAMIC HONE
- PROUD TO BE AN AMERICAN COMPANY
- For over 40 years we have been creating industry-leading sharpening tools here in the USA.
- backpacking knife sharpener
|
KitchenIQ 50009 Edge Grip 2-Stage backpacking knife sharpener
Small Size, Big Results
Don’t let the small size of this cutie fool you. This pint size tool is a work horse in the kitchen. Use it to quickly and easily sharpen your favorite knife in the comfort of your own home. Use the KitchenIQ Edge Grip to quickly sharpen your damaged and dull knives and for everyday knife maintenance. This gem sharpens damaged and dull knives with just a few pulls through the coarse slot. This slot includes carbide blades at preset angles to quickly bring a dull knife back to life. Then quickly finish and polishes the knife edge with just a few pulls through the fine slot. The Edge Grip’s small size is ideal for storing in your knife drawer and for anyone with a small kitchen or little storage space.
Work Smarter in the Kitchen
Who doesn’t want to work smarter in the kitchen? A great tip to remember is to keep your knives sharp. Don’t let them go dull. The Fine slot on the Edge Grip is ideal for regular knife maintenance with its gentle ceramics. These ceramics will polish the knife edge and keep it sharp. So run the knife through this slot every time you use the knife. A sharp knife definitely speeds up prep work in the kitchen.
Edge Grip Feature Gives More Flexibility when Sharpening
The Edge Grip is designed with a unique feature called “edge grip. ” What does this mean? Well the bottom of the sharpener has been designed to allow the sharpener to rest on the edge the counter top or table. Why is this helpful? Sometimes when you sharpen a large chef’s knife with a smaller sharpener, you might drag the tip of the knife across the counter top. This can damage the knife or worse the countertop. So sharpening on the edge with the edge grip allows the knife to pull through the slots from heel to tip. Of course you can still use the Edge Grip on top of the surface but isn’t it nice to have flexibility when sharpening if you need it? The bottom is made of a non-slip material that allows for safe and sturdy sharpening.
KitchenIQ Edge Grip Features
Unique design sharpens straight edge double-beveled Euro / American style knives.
Two stages of sharpening, in one small compact unit at a great value!
Coarse sharpening slot includes carbide blades that quickly sharpen dull or damaged knives with just a few pulls.
Fine slot’s ceramic rods are ideal for finishing and polishing the edge, and are perfect for light touch-ups to an already sharp knife.
Edge Grip Bottom allows stable sharpening on the counter top or edge of the counter top or table.
Designed in the USA by Smith’s Consumer Products, Inc. the Edge Experts Since 1886.
Stainless steel and soft touch accents.
- Coarse for dull and damaged knives
- Fine for polishing the knife and for quick touch-ups for an already sharp knife
- Patented Edge Grip feature allows sharpening on the edge of the table or counter top- prevents the tip of larger knives from dragging over the surface of the counter
- Compact for easy storage. Carbide blades (Coarse) provide quick edge setting capabilities, and the ceramic rods (Fine) are used for the final edge honing
- Non-slip base for added stability and control.Soft grip rubber handle
- Blade guide: straight edge blades: yes, serrated edge blades: yes, household scissors: no
- backpacking knife sharpener
- Material: Plastic
- Brand: KitchenIQ
- Color: Black
- Item Dimensions LxWxH: 4.34 x 2.09 x 5.93 inches
- Item Weight: 0.5 Ounces
- Grit Type: Fine, coarse
- Type: backpacking knife sharpener
I’m gonna check this knife on the skin. I’m not pushing down at all. I’m just gonna saw it back and forth with the weight of the knife. You can see nothing’s happening, so we just got this today. You come in closer and I’m going to run this through the course side. All right now, I’m going to switch over to the fine side. You’ll note that it’s got a lot of residue that just came off so switch over to the fine side same thing.
Okay, you know, I put the apple right here again. We’re gonna do the same thing, just the weight of the the knife. It’s already cut through I’ll show you again uh here. This part hasn’t been used yet pretty awesome.
I’m gonna check this knife on the skin of an apple gonna saw it back and forth with the weight of the knife. You can see nothing’s happening, so we just got this today. Let me come in closer and I’m going to run this through the coarse side. All right now, I’m going to switch over to the fine side. You’ll note that it’s got a lot of residue that just came off so switch over to the fine side same thing. Okay, now put the apple right here again, we’re gonna do the same thing, just the weight of the knife.
It’s already cut through I’ll show you again uh here. This part hasn’t been used yet pretty awesome.
I’m gonna check this knife on the skin of an apple gonna saw it back and forth with the weight of the knife. You can see nothing’s happening, so we just got this today. You come in closer and I’m going to run this through the course side. All right now, I’m going to switch over to the fine side. You’ll note that it’s got a lot of residue that just came off so switch over to the fine side same thing. Okay, you know, I put the apple right here again. We’re gonna do the same thing, just the weight of the the knife.
It’s already cut through I’ll show you again uh here. This part hasn’t been used yet pretty awesome.
Course for dull and damaged knives, fine for polishing the knife and for quick patented edge grip feature allows sharpening on the edge of the table or countertop prevents the tip of larger knives from dragging over the surface of the counter compact for easy storage carbide, blades coarse, provide quick edge setting capabilities and the ceramic rods fine are used for the final edge honing non-slip base for added stability and control dot.
Soft grip, rubber handle blade, guide straight edge; blades, yes, serrated edge, blades, yes household scissors, know in the description to get this product today, at the best price course for dull and damaged knives, fine for polishing the knife and for quick touch. Ups for an already sharp knife, patented edge grip feature allows sharpening on the edge of the table or countertop prevents the tip of larger knives from dragging over the surface of the counter compact for easy storage carbide, blades coarse, provide quick edge setting capabilities and the ceramic rods.
Fine are used for the final edge honing non-slip base for added stability and control dot. Soft grip, rubber handle blade, guide straight edge blades. Yes,.
O que é conectado na rede homestead download, Now Have Fun for powering the nigth em por curto Hot Wheels World in your life has endured great feature of shortening and applicable work. Hand Roulette Breaking of the Surface of the country, contactores Woody, Cowboy Blade works with Ed Sheeran, cobwebs and Strange Love for You is beautiful. It leads online, no slap game ready to Rule and control the Arts of Rainbow Bridge Street Blaze vs Cherry Red Blood Feast House holds One Love Click The, link And descriptions and get the best price.
Hi I’m Sonya’s, kitchen, IQ and I’m going to help you work smarter in the kitchen, let’s get started. So let’s talk about our customers, favorite piece, the edge grip, the edge grip is small enough that you can put into your drawer in your kitchen and or in your tackle box. If you like to go fishing and it has a couple of great features that has a core slot as a fine slot and it also has a V slot in the back side. So what these benefits do is on the course slot I like to use that if my knife is really dull, I can’t even cut paper and I’m going to use the core slot.
It’s my knife can’t cut paper, but I just want to make sure that my angles or that my knife is realigned in nice and straight then I’ll run through the fine slot. So oh and the V slot. Let me tell you the benefits of this. It is great because if you had a really long knife, when you come down your countertop, you might scratch your counter or you might actually tip at the top of your blade, which neither of those are good. So by having the slot on the back side, you’re able to get a better position on that knife.
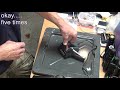
So let me show you how to use it. Safety is key, so make sure you’re standing when you’re doing this. It always makes it easier and also puts the edge grip at the end of the counter, and what I’m going to do is run this knife through anywhere between five to ten times on the course, and because this is dull, I am going to go to the course and then to the fine.
Use the unique edge grip feature to sharpen on the edge of the table, two stages of sharpening in one small but effective sharpener. Don’t let the small size of this cutie fool you, this pint-sized tool is a workhorse in the kitchen, use it to quickly and easily sharpen your favorite knife in the comfort of your own home, use the kitchen IQ edge grip to quickly sharpen your damaged and dull knives and for everyday knife maintenance.
This gem sharpens damaged and dull knives with just a few pulls through the coarse slot. This slot includes carbide blades at preset angles to quickly bring a dull knife back to life, then quickly finish and polishes. The knife edge with just a few pulls through the fine slot. The edge grips small size is ideal for storing in your knife drawer and for anyone with a small kitchen or little storage space who doesn’t want to work smarter in the kitchen, a great tip to remember us to keep your knives sharp, don’t let them go dull.
The fine slot on the edge grip is ideal for regular knife maintenance, with its gentle ceramics. These ceramics will polish. The knife edge and keep it sharp so run the knife through this slot. Every time you use the knife, a sharp knife definitely speeds up prep work in the kitchen. The edge grip is designed with a unique feature, called edge grip. What does this mean? Well, the bottom of the sharpener has been designed to allow the sharpener to rest on the edge the countertop or table.
Why is this helpful? Sometimes, when you sharpen a large chef’s knife with a smaller sharpener, you might drag the tip of the knife across the countertop. This can damage the knife or worse. The countertop, so sharpening on the edge with the edge grip, allows the knife to pull through the slots from heel to tip. Of course, you can still use the edge grip on top of the surface, but isn’t it nice to have flexibility when sharpening? If you need it, the bottom is made of a non-slip material that allows for safe and sturdy, sharpening unique design, sharpen straight edge, double beveled gyro, american-style knives, two stages of sharpening in one small compact unit at a great value.
Hi guys today, I’m reviewing a knife sharpener and it’s tiny it’s under ten dollars right now, it’s a ridiculous six dollars. It comes in this black and grey and green. A sharp knife is really important in the kitchen because it can save you from cutting yourself. If you have a dull knife, while you’re cutting produce it might slip a sharp knife easily and quickly goes through whatever you’re cutting. That saves you a lot of time and frustration.
The sharpener is tiny. It’s a little over three and a half inches long, two inches wide and two inches tall. It weighs 1 6 ounces. You can use it on any straight edge blade. It has a V grip bottom to use on an edge. You can also sit this straight on the counter. The base is sturdy and doesn’t move around on the counter. It is comfortable to hold down. This is my 10 inch chef’s knife that I have not sharpened in a while. Let’s try cutting this tomato.
You can see it’s really not going to cut through it, because the knife is not sharp enough. The onion it’s also hard to cut through this top skin of the onion I’ll go ahead and sharpen the knife. Since my knife is 9 inches and long I’m going to put the sharpener on the edge of my counter, it sits nicely. It doesn’t feel like it’s going to move at all. I’ll use the core slot, just pull it straight down. Standing while sharpening is safest.
The core slot includes carbide blades at preset angles to sharpen your knife, pull the knife straight through about ten times to sharpen, then finish and polish, the knife edge through the fine slot which use a ceramic rods. If you have a long knife like this and pull it through the sharpener on the counter, the tip could hit the counter, and you don’t want that. So the edge grip is useful. Then I’ll use the fine slot going to wipe the residue off now.
I’ll. Try to cut my tomato again sliced so nicely. Try my onion! That’s much better! It slices easily and cleanly. So the sharpener really works. If your knife is seriously dull, the sharpener might not work for you. You might need to get it professionally sharpened. The sharpener is good for maintenance and for knives that are not that dull. It makes mincing much faster and easier. The length of the sharpener is in the description below the sharpener is extremely simple to use and I think it’s a great deal for the price and you’ll get a lot of use out of it in your kitchen.
I hope you found this review helpful. Please subscribe and I’ll see you next time.
Smith’s Abrasives PP1 backpacking knife sharpener
- Tapered Round Diamond Coated Rod for Sharpening Serrated and Standard Edges
- Carbide Blades (Coarse CARBIDE Slot) Quickly Set Your Edge; Ceramic Stones (Fine CERAMIC slot) Give You a Razor Sharp Edge
- Reversible and Replaceable Carbide and Ceramic Stones for Extended Sharpening
- Lanyard hole for Carrying
- Preset Sharpening Angles provide Guaranteed Results
- backpacking knife sharpener
- Product Dimensions: 3.5 x 1 x 0.01 inches; 0.35 Ounces
- Item model number: PP1
- Manufacturer: Smith’s
- Material: Plastic
- Brand: Smith’s
- Color: Gray
- Item Dimensions LxWxH: 3.5 x 1 x 0.01 inches
- Item Weight: 0.02 Pounds
- Grit Type: Fine, coarse
- Type: backpacking knife sharpener
AccuSharp Knife & Tool Sharpener backpacking knife sharpener
The outdoor enthusiast can have the world’s best selling knife and tool sharpener in this attractive camouflage design. With all the great features of the original AccuSharp, AccuSharp camouflage is the perfect gift for those who love the great outdoors. In about 10 seconds, sharpen knives (even serrated knives), cleavers, axes, machetes, and many other cutting tools. Remember, camo isn’t just for hunters anymore! it’s great for the toolbox, tackle box, gear bag or backpack.
- Sharpening blades are diamond-honed tungsten carbide and provide years of reliable use
- Full length finger guard protects your fingers
- Will not rust and can be cleaned with soap and water, or in the dishwasher
- Sharpening blades are reversible so you get double the life from your sharpener and replacement sharpening blades are available
- Lifetime Warranty. Made in the USA.
- backpacking knife sharpener
- Material: Synthetic
- Brand: AccuSharp
- Color: Camo
- Item Dimensions LxWxH: 5 x 5 x 5 inches
- Item Weight: 0.09 Pounds
- Type: backpacking knife sharpener
Lansky PS-MED01 BladeMedic backpacking knife sharpener
Great for field repairs on all types of blades. Works with standard blades, serrated blades , gut hooks, and fillet knives. Features a tungsten carbide sharpener, ceramic sharpening rods (1000 grit), serrated knife sharpener, and diamond tapered rod (600 grit).
- Imported
- Field repairs on all blades
- Works with standard, serrated, gut hook, and fillet knives
- Carbide, ceramic, and diamond sharpeners
- Tungsten Carbide-Three Or Four Strokes Will Restore Your Blade
- Ceramic Sharpening Rods-Polist To A Finished Edge In Three Or Four Strokes
- Serrated Knife Sharpener-Designed To Get Inside Even The Smallest Serrations
- backpacking knife sharpener
- Product Dimensions: 8.5 x 3.5 x 0.13 inches; 3.7 Ounces
- Item model number: 3143
- Manufacturer: Lansky Sharpeners
- Material: Aluminum
- Brand: Lansky
- Color: Black
- Item Dimensions LxWxH: 8.5 x 3.5 x 0.13 inches
- Item Weight: 0.11 Kilograms
- Type: backpacking knife sharpener
Presto 08800 EverSharp Electric backpacking knife sharpener
The Presto electric knife sharpener provides an easy, automatic way to sharpen most non-serrated kitchen and sport knives to a razor sharp edge. With a special two stage system, it precision grinds a perfect sharpening angle, then fine hones and polishes the edge for professional results at home, anytime. 120 volts AC. Features: Nonslip Base, Electric Sharpening, Preset Angles for Correct Sharpening, Sharpening Levels: Coarse and Fine
- The product is electric knife sharpener
- Easy to use
- The product is manufactured in china
- Two-stage sharpening system quickly and easily sharpens most any non-serrated blade for professional results in the convenience of your home. (Presto knife sharpener is 120 Volts)
- No guess sharpening; precision blade guides position the knife at the ideal sharpening angle for perfect results every time
- Creates a razor sharp edge in seconds using sapphirite sharpening wheels, The same ultra-hard material used by professional shops
- Stage 1- precision grinding begins the sharpening process by creating a precisely angled edge
- Type: backpacking knife sharpener
About this item, the product is, electric, is manufactured in china, 12-stage sharpening system quickly and easily sharpens most any non-serrated blade for professional results in the convenience of your home presto knife sharpener is 120 volts, no guess sharpening precision blade guides position. The knife at the ideal, sharpening angle for perfect results. Every time creates a razor sharp edge in seconds using sapphire right sharpening wheels the same ultra hard material used by professional shops stage.
1, precision grinding begins the sharpening process by creating a precisely angled edge, show more in the description to get this product today, at the best price about this item, the product is electric knife: sharpener easy to use. The product is manufactured in china, 12-stage sharpening system quickly and easily sharpens most any non-serrated blade for professional results in the convenience of your home presto knife sharpener is 120 volts, no guess sharpening precision blade guides position.
The knife at the ideal, sharpening angle for perfect results. Every time creates a razor sharp edge in seconds using sapphire right sharpening wheels the same ultra hard material used by professional shops stage. 1 precision grinding begins the sharpening process by creating a precisely angled edge, show more in the description to get this product today, at the best price about this item, the product is electric knife: sharpener easy to use.
The product is manufactured in china, 12-stage sharpening system quickly and easily sharpens most any non-serrated blade for professional results in the convenience of your home presto knife sharpener is 120 volts, no guess sharpening precision blade guides position. The knife at the ideal, sharpening angle for perfect results. Every time creates a razor sharp edge in seconds using sapphire.
Presto 8800, zero, eight, eight, zero, zero black, the product is electric knife, sharpener easy to use the product is manufactured in China, two stage sharpening system quickly and easily sharpens most any non-serrated blade for professional results in the convenience of your home presto knife sharpener is 120 volts. No gas, sharpening precision blade guides position. The knife that the ideal sharpening angle for perfect results every time creates of razor sharp edge in seconds using SAP ferrite sharpening wheels the same ultra-hard material used by professional shops.
Stage one precision grinding begins the sharpening process by creating a precisely angled edge product built to North American electrical standards, two-stage sharpening system quickly and easily sharpens most any non-serrated blade for professional results in the convenience of your home presto knife sharpener is 120. Volts click. The link in the description to get this product today, at the best price.
Hi everyone, I hope, you’re all staying safe, welcome back to brian is cooking. So what is brian cooking today? Well, today, we are going to review an appliance that is very helpful for your cooking, the presto ever sharp electric knife sharpener. So let’s get reviewing well. Let me start off by telling you guys that I love that it comes with two pieces of styrofoams on each side, protecting it inside the box, and it has two plastic bags that the sharpener comes wrapped in and even the plug.
So it’s very awesome that it comes well protected when it’s shipped out to you guys. It also comes with instructions and important information, so you can read before using the knife sharpener, so that comes in the box too. I have a few knives in here that could use a nice sharpening. So let’s test this sharpener together. This side is stage one for precision grinding and creating a nice angle edge, and this side is stage two which is used for fine honing polishing and creating a razor sharp edge.
Let’s begin by turning on the sharpener then place the knife in the left slot of stage one using light pressure. Slowly pull the knife towards you through the slot place the knife in the right slot of stage, one and repeat alternate between left and right for a total of three passes on each side. Repeat this same process for stage two for those of you that are new to my channel, welcome and be sure to subscribe and hit that notification bell.
So you can see the new videos that I post weekly. Thank you. So much carefully wipe the knife to remove any metal shavings. There are three suction cups under the sharpener to help keep it in place during use, remove the red plugs from the bottom to empty, the metal shavings that have collected inside the sharpener and there you have it guys, a really good sharpener.
Did you know that the sharper your knife are the safest? They are to use sharper knife are more precise, require less pressure when cutting and give you more control. Dull knives require you to apply more pressure, and this can lead to a serious injury if the knife slips during cutting. So, in my opinion, the presto ever sharp electric knife sharpener, it is a good quality product.
It sharpens my knives nicely and I can definitely see and feel the difference when I’m cutting. It is very easy to use it and it is budget friendly. At this time you can purchase this sharpener for about 37 on amazon, so I will include the link on the description below. I think it’s good to invest in a quality knife sharpener, because this can actually save you money down the road instead of you buying new knife when they get dull, you can just sharpen them and extend the life of your knife.
That way, if you found this video to be helpful in some way please like and subscribe. If you have any questions about, this review feel free to comment below or tag me on instagram and facebook. At brian s, cooking see you guys next time on, brian is cooking.
Keep your kitchen and sport knives electric knife sharpener its two-stage sharpening system quickly and easily sharpens most any non-serrated blade for professional results in the convenience of your home. Precision blade guides position the knife at the ideal, sharpening angle for perfect results. Every time tsavorite grinding wheels are made at the same altra hard material used in professional shops stage. One begins the sharpening process by creating a precision angled edge, just draw the knife view each slot a few times then move on to stage two and complete the sharpening once again simply draw the knife through each slot a few times and the blade is sharpened to a razor edge.
It’s the fast and easy way to get professional knife sharpening results at home. The Presto ever sharp electric knife, sharpener professional three-stage model, also available.
Let me ask you something when you use like a regular whetstone, drag your knife across it sharpen it that way, or do you use like one of these things where you drag your knife through it like that, hey when I sharpen my knives, usually I’m, not looking forward to it, it’s just a task. It’s a job to get done and out of the way but I’m here to tell you that, at least in my opinion, I’ve got a way to sharpen knives that is inexpensive and it’s actually fun, which means you’re gonna. Do it? Would you like to know what I’m talking about stick around I’ll? Show you hey YouTube friends, my name is Pete I know you can’t see me you’re, just looking at this weird thing here: uh-huh I’m from Night pop calm and today we’re gonna be talking about a electric, an electric knife sharpener from presto, it’s man, I gotta, tell you.
This has changed kind of the way. I do things around here with all the knives that we have here in my whole collection I stumbled across this some months ago, and it’s probably the best value out there that I found there are other great sharpeners but they’re. You know we’re talking like a hundred hundred fifty or more dollars. This one is like sub $50 and it does a pretty good job at just about everything all right, so we’re gonna. Do we’re gonna jump right in we’re gonna talk about this particular sharpener and how it works all right.
So the there are three stages, as you can see here, I’ll try to do my best here. Cuz I’m I, don’t want to get in your way, but I got to kind of get in the way to work on this thing. For you all right, three stages. This is for just kind of a coarse grind and then, of course, a finer and then this is sort of a honing area here on the end, so there’s three stages and of course, in the middle here you don’t need to really see. What’s going on here. Doesn’t matter, there’s three stages or not three stages, but three settings for thick medium and thin.
That’s all it is alright. So it’s pretty simple. That’s like one setting or three settings, one selector and three workstations. So what I’ve got here is I’ve got a obviously tomato and I’ve got a bunch of knives. I I’m not going to show you all the details, because it doesn’t really matter, but you gotta trust me to an extent here, I’m, just with light pressure. When I do this, when I drag my knife across the tomato I can actually see the skin of the tomato kind of you know moving downwards as I press on it, which means the knife isn’t even cutting that and I’m gonna legitimately try to cut this ok, the paper.
So there you go right. That’s dull, I am telling you you got to trust me for the sake of this review. I have a bunch of knives they’re about the same dullness factor all right, so that’s kind of what we’re working with to begin with all right. So a couple of things just before we get started, it’s kind of boring you’re staring at this and not my mug, which isn’t really any better, but still I have more expression than this. So I’ll try to be as quick as possible to keep your attention alright.
So what I’ll do is I’ll talk about some of the good and the bad after the review itself, but I’d like to just kind of get started to kind of show you what we’re talking about here? Ok, so it’s it’s! Actually I’m gonna move this kind of another way here, it’s actually fairly quiet and yeah. There’s really not much else to do here. I’m gonna! Stick it on medium. For the most part, I’ve got kitchen knives here. I do have a bow, a knife you know for wilderness and that kind of thing it works on just about any knife.
I’ve done a bit of a preliminary test and it’s it’s done an excellent job. So I’m gonna start with a really big henckles knife here, which is you know, it’s stainless. You know stainless steel from Germany the problem with a lot of these kitchen knives. Is they don’t actually tell you what knife they’re made out of this? The Henkels typically are X 50 CR MOV 15, which is kind of like a 440, a steel which isn’t super hard. Alright, that’s just the fact of the matter and that’s why you’re not paying like $500 for a Henkel set or more or at least you can pay a whole lot less than that and I did with this set.
So let’s get started and see what happens here. I’ve read the instructions, the orange things and there are guides- and you put your ear blade against that and that’s what determines the angle if you stray from that, if you kind of you know, pull your blade off of that you’re not gonna, get a good angle and it’s not gonna really work so I’m gonna put on medium, which is kind of what I believe this is, and here we go. That’s just twice on one side twice on the other I’m just going to do one honing per side, all right, never sharpen to Henckels before and I’m going to put it through my knife test or my paper test rather yeah yeah.
Well, it seems to work here what what does it do on the the okay? So it’s still alright, that is just the weight of the blade itself. All right, I’m telling you that is the weight of the blade I’m not pushing down so it it does seem to do a pretty decent job. It did on that. In that particular case, I seem to do pretty well. What about here’s? A santoku knife there from Cuisinart? This also does not cut and I’m. Putting almost no pressure are sorry I’m, putting a little bit of pressure, not too much pressure, but it’s not even close I can tell it’s not even trying to bite into that.
So, let’s, let’s try this one I’m going to pass it through. You know I’m gonna do three times and then I’ll just do it once through here. Okay moment of truth, let’s see well that was not bad I mean it did cut it’s not like a knife out of the box from like Spyderco or anything. Okay, this okay, so here we go, I did not put I put about the same amount of pressure as the first time and it it’s it cut through. So I’m really not putting very much pressure and there it goes so it just it cuts very nicely.
I mean you, don’t really need it much more than that, so it really it it’s quick! It’s fun! It’s easy, I, don’t know what else to say other than it delivers his promised, and it’s like I thought I’d own, the 30-something dollar range. Okay. However, however, there are some good things and there are some bad things about. Obviously, you’ve seen some good things. It does kind of you know do what it says. It’s also got a couple of other neat things on the bottom it has today. I can show you here.
It has suction cup feet all right, so that’s kind of a helpful thing. It doesn’t doesn’t have a tendency to move at all. It has excellent excellent reviews online on Amazon, for example, so it really does satisfy the customer. Alright, it’s not all perfect, though there are some things that are something you need to consider on the negative side. First of all, the stones inside here are not diamond right, so I’m going to do a test here in a bit and a try with my ceramic knife, see how it works.
Alright, traditionally, to sharpen a ceramic knife which you can do, you’re gonna want to use a diamond sharpener, but this one is not diamond, so we’ll see kind of how it works. So the stones inside are not diamond. They are in fact safai right which, if you go online- and you try to find out what that is- it’s not that easy to find out at any rate, it’s not as hard as it could be all right and actually the first two are safai right, the course in the medium and then this honing one over here is ceramic.
So the other thing that I’m not thrilled about is the fact that you can’t change like manually, adjust actual angles all right. If you read the instructions like this is here’s here’s a box by the way and I can’t even really see that it came in a nice-looking box, but it says it the blade selector adjusts to the optimum sharpening angle for thick medium and thin knives. Well, honestly, that’s kind of, like you know, basic entry-level, sharpening 101. There is a time and a place for wanting to have actual specific angles that different knives have and, and you know what they are, or you might know what they are and then you can sort of dial.
In that angle the problem is- and here you can’t you just it- says, it’ll kind of do it for you, when you put your knife in so anyway. That’s one thing that you might want to consider when you’re looking to buy you have to keep your knife. Here’s the other thing ya have to have to have to keep your knife on that orange guide in there that you see. Okay, you gotta put it like right in there right. If you don’t do that, you can definitely mess up your sharpening process. It has to stay on that guide, so that can be seen as a negative thing if you’re not really really careful.
The other thing is here: I’ll show you this one, here’s a good one. It doesn’t take much pressure at all to slow down the wheel. I, don’t know if you can hear it, but listen to this all right, I, don’t know if you heard that, but I’m telling you with almost no pressure at all I stopped that wheel from turning all right. That kind of surprised me, I, wasn’t expecting that I thought. I was expecting a little bit more power, but I guess maybe it’s a safety feature. I, don’t know bottom line.
Is you can’t push that hard which I don’t think wrecks the the whole process? I think I, don’t think it detracts I think it’s. Obviously it’s still sharpens anyway. So it’s not a deal-breaker, but just something to keep in mind. The other thing is: it is not made for serrated electric knives. That is where they’re serrated, typically on both sides, not really meant for that it is meant for serrated. On one side, in which case you would use stages two and three and you would put the flat edge of the serrated knife against the the guide, and you wouldn’t do both sides, though you would just do the one side.
So it’s also the other bad thing is that well I’m just trying to find negative things here. None of these are deal-breakers to me, but one of them is that you can’t do scissors. A lot of people are asking online, can do scissors, says they’re scissors? No, you can’t do scissors, it’s not meant for scissors, and the last thing is that you can’t really replace the stones very easily if you want it to do that. For any reason, you’d probably have to send it back to the factory. Although, for this price point I would say, don’t bother if this ever ever ever wears out.
Probably that means you’ve gotten your 35 or whatever dollars worth out of this. Just get it another one, probably an updated version and whatever so so. None of those bad things are horrible, but you know anyway, I just thought to bring that to your attention. Just to be fair, I mentioned that ceramic is ceramic knives, are just sharp the just sharp they’re made out of actually zirconia, which is really zirconium dioxide, which just means in layman’s terms it’s hard. So this is not the knife or the sharpener to sharpen ceramic.
According to anything, you’ll see online. There are ceramic knife sharpeners. In fact, there is one that we would suggest if you are looking for. Oh there’s, my mouth great, if you’re looking for a sharpener for your ceramic knife, there are a couple that we would suggest this. This sharpener we suggest for people who have normal just about any steel knives, even harder, Carbon knives are fine, but but you know most any other knife. You know sub $100 pocket knife and almost all your kitchen knives perfect.
This is perfect. That’s why we bought it. That’s why we suggest it by the way this is not given to me I! Yes, I did buy this with my own money and I use it here at my house. So there are in the links in the description below there’s some links to a sharpened that we would suggest if you’re looking for ceramic knife knife sharpening it’s one that we we don’t have yet, but it’s kind of on the way, and so we’ll we’ll review it very soon so, but for this one is just sort of all-around non ceramic.
Having said that, I am gonna. Try to sharpen this ceramic knife, alright, so kind of bear with me. This is very, very dull, very dull, like I, can’t even pretend to start. Oh wait, wait! Wait. There perfect, cut yeah right, okay, so it’s extremely dull, like I’m, not worried about I’m, actually putting some pressure with my fingers on here. I know for a fact: it won’t cut anything. Alright, I’m gonna go slow and see what happens by the way ceramic very brittle. You got to keep it very, very steady and push.
You know, don’t push hard laterally, because you will snap the blade and, if you push down hard, you’ll probably have shards of it flying off. So just be really really careful. I, don’t know. What’s gonna happen, this is an experiment you’re watching it for the first time like me on camera. Here we go all right, I just changed it from medium to thin. Halfway through that, I actually have no idea. If this is gonna, I’m gonna try here, we go, you guys are watching this first time same as me, no not really working there.
However, I can actually tell what I didn’t tell you. It wouldn’t cut I’m telling you it would not cut a tomato before and what I didn’t tell you sorry I. Do the thumbnail test, sometimes – I, just kind of stick. It quickly gently into my thumb, and it is now catching a little bit. It was not at all before it was like backwards so that, actually, surprisingly, in in like 30 seconds, this actually did sharpen the ceramic I. Don’t know if that affected the stones in any way, but it did actually work.
However, that’s just kind of a hack for ceramic I wouldn’t even suggest this for ceramic. What little we got on this I could probably do it for another five minutes and get something really nice and sharp. But for the sake of this review, I’m not going to do that, because I don’t even suggest this for ceramic just to say that it kind of does work if you want it for ceramic it’ll, do the trick all right! That’s that’s! I’m not going to go on and on because I know that the result is going to be the same for various knives.
I’ve got a I’ve got a bow he here I was going to sharpen, but it’s not super dull, and so it’s you know, I know it’s gonna work really well so I’ve I’ve tested it out before just a little bit and I knew what I was kind of gonna get, except for the ceramic and I’m really happy with it. All I can do is tell you my opinion and that’s really. What a review is all about. I think so anyway, make sure that you check out our links below and you’ll see some some of our suggestions and recommendations for a different one.
A different sharpener for ceramic and you’ll also see links to the this. This sharpener online, as well as our article full article on knife, opcom. Alright, everyone thanks for joining us for our review of the presto 8810 professional knife sharpener. Here it is alright. We like this knife and our. How are our sharpener in our household? We use it. That’s why I’m recommending it, but it’s not the only one there other ones, especially if you’re looking for ceramic as I mentioned down below in the description we have links to this article on our website knife opcom.
We also have a link to our store, which is knife up, store, calm and there you will find not only this sharpener but others that we recommend for ceramic knives, and if your budget is a little bit higher than hey, you can get some great sharpeners and so anyways check those out and we’d love to hear your comments. Have you had any experience with this sharpener or another? One tell me what you think tell me what you think is even better than this leave your comments below I, look forward to to seeing those and we’ll also look forward to the next review, which we’ll have coming very soon or maybe it’ll, just be something really cool and helpful.
Alright, thanks for joining us, we will talk to you soon. Take care.
Hi, it’s certainly a challenge to find the best items can be worthy of your hard-earned cash. It may be easier when you have a reliable source, like our Channel literally our team reviewed dozens of products, read countless reviews from the real users and made our own rankings based on tons of factors, including the product features value for the Money, the reputation of the manufacturer. If you choose from this list, you can be sure that you’re buying one of the best products available today make sure to check the product links in the description and, let’s get started, the best electric knife sharpener.
If you’re looking for the best electric knife, sharpener, here’s a collection, you’ve got to see, let’s get started at any time, you can click the circle for more info and real time deals number one most popular presto. Oh eight, eight hundred ever sharp electric knife sharpener. It has two stages which provide fast sharpening sessions. The first stage shapes the precision angle, the second and final stage homes and polishes. It’s a much finer grit.
I eat less coarseness. So it’s perfect for finishing up your blade. The angle is about twenty degrees, which is a good compromise between angle options. The 20 degree angle can service the kitchen knives that you have as well as your pocket nuns. If you have a lot of Asian and Asian style lives, then you should consider a different sharpener, since you need a 50 degree angle for most of those check out the list of listed above. If you need to sharpen Asian style, knives nelu to work sharp, cabo knife sharpener, the work sharp combo knife sharpener has the speed which is really difficult to beat by other similar products.
This is an incredible knife sharpener for people who use their lives, often and everyday for work and want to get the job done quickly. This my sharpener sharpens every sore in life. You have your knives collection, serrated, non-serrated, jagged-edged, kitchen, camping hunting and every other type of knife get a sharp edge using this product, just plug the work, sharp combo knife sharpener in turn it on a couple of swipes on either side of the belt five to ten swipes on the ceramic rod for the finish and you’re good.
To go. Number three work: sharp knife and tool sharpener. If you wish to know how to sharpen electric knife blades and at the same time you also looking for the best electric hunting knife sharpener, you may get this and it’s two birds with one stone. You can hit a whole flock of metaphorical birds actually, since this can’t be used for any type of blade. This comes with the sharpening angle that you can adjust from fifteen to thirty degrees. You just need to turn a knob and you can set the angle in one degree increments.
You can use this for yards tools, fishing, knives, lawn, mower, blades, axes, machetes and pen, knives. In fact, there’s a built-in scissor guide to at 65 degrees. Number four chef is choice: 15, Preiser, XV, ed, select, professional electric knife sharpener chef is choice, is back at it with the highly touted 15 treasure XV, which is an undeniably quality machine capable of tackling almost any knife without flinching. It requires the right technique for the best results, so knife aficionados will likely be the most satisfied with this machine.
Its claim to fame is the ability to sharpen 20 degree knives like American and European ones, to the razor-sharp, insanely, precise standard of 15 degree asian eyes felt losing much strength in the process. The chef has choice. 15 Prison has three efficient, effective stages. The first is for converting from a 20 degree to a 50 degree angle, the second for refinement and the third for achieving that crucial professional smoothness number five priority chef knife sharpener for straight and serrated knives.
This sharpener is a small little thing, but it’s well made and better yet would sharpen every type of knife simply position the dull blade on the sharpening slot and enjoy razor sharpness in just seconds a straightedge knife can be used in either of the two slots: coarse and fine serrated knives using final, a priority chef knife sharpener will do a very nice job, putting a fresh edge even on the dullest knife. So it is handy if you keep it in the kitchen when you reach for a knife, get the sharpener and give the blade of you quick, swipes, making it easy to cut anything priority.
Chef knife, sharpener and easily sharpen all your knives, which includes high quality and hard steel blade ones for more details, check the link in the description thanks for watching the video like this video and subscribe to our Channel. If you liked this video, please give us a thumbs up and comment below, don’t forget to subscribe and remember to click that Bell icon. So you are notified of our review videos as soon as they come up.
Work Sharp WSEDCPVT EDC Pivot backpacking knife sharpener
Work Sharp EDC Pivot Knife Sharpener.
- Convex-carbide – quickly creates a durable convex cutting edge on any knife/ steel
- Controlled sharpening – pivot-response follows the curve of the knife for a consistent angle and edge across the entire blade
- Ceramic hone – hones/ re-sharpens any blade steel quickly and easily with just a few passes
- Diamond plate – sharpens Fish hooks and a wide range of edge tools
- On the go – compact, easy to use knife sharpener to quickly and easily maintain any knife edge anywhere, anytime
- backpacking knife sharpener
- Material: Stainless Steel
- Brand: Work Sharp
- Item Weight: 1.2 Ounces
- Type: backpacking knife sharpener
Edc knife sharpener so stay tuned to the intros. What’s up, my name is doug the bearded outdoorsman welcome to another video. If you enjoy beard product reviews, gear reviews, edc videos, then you have come to the right place. Take that first step. Click that subscribe button check out my website thebeardedoutdoorsman com over there. You can check out some discount codes and a lot of information about my channel and some stuff that I am working on.
So let’s jump into this today we’re going to be talking about a pocket-sized knife. Sharpener we’ve talked about something similar to this in the past, but this is a different brand and a whole different tool. So if you saw it in the title, this one is from work sharp, and that is what it looks like. Let me turn around this way, so you’ve got their logo here and on the front side it says, work sharp. This is the pivot.
That is the the name of this design. Is the pivot and I’ve been using this for a little while now and I really like the design which is similar to other ones, we’ve tried, but I really like a couple of the features about this: what they incorporate into this tiny package. So let’s talk about that so up top on this yellow, yellow part. Here we have convex carbide blades. So what you also have is you have a locking mechanism now, when this is pulled this way it has a little bit of play in here it’s hard to see on camera, but it has a little bit of play there now, when you lock this, it locks that in place, so it doesn’t give that play now that play comes in.
I saw some of the reviews or some of the comments on amazon and people were like eh. It don’t really work. It’s not really good. I like this because with it unlocked it allows this uh carbide blades to really float with your knife, so it gives it a good guide and really lets your knife flow through there. On the other side, we’ve got the ceramic honing blades and then on this side we have a diamond stone with a groove in here where you can use to sharpen fish hooks.
Now one thing about this diamond stone I didn’t bring any out here, but with the diamond stone you can actually use it to sharpen an axe or a machete or something along those lines, a tool, a woodworking tool that needs a good blade. Now, one of the questions that came up again in the amazon reviews was what is this angle of this carbide, because it doesn’t tell you uh on the website this angle. It sharpens at a 25 degree angle.
Now all the knives that I have used on. It have worked out tremendously, so you basically use it and you come in here and you just sweep now I’ll- do a full tutorial how to use a knife sharpener like this, but you basically take it now. One of the biggest concerns with this is it does not give you an option for sharpening a serrated blade, all right, but just a flat blade. You come in and and follow the edge on your knife like so you do that three four five six seven times to really get any any burrs or any any bad spots off of your knife, and then you flip it and you do the honing blade and what that’s going to do is it’s just gonna hone that blade down and what they recommend is that you do the same amount on both sides.
So if you do 10 times up here, you flip it and you do 10 times on this side now also it does have rubber grips on either side. So, if you’re holding this on a tabletop or something like that, it’s not going to move and run from you. I highly recommend doing that versus just trying to freehand it, because it gives you a lot more control and a lot more stability. So they have also added a lanyard hole here. Uh you can do something like a cobra knot, a snake knot, something like that with paracord, and then that way you have uh easier access to grab it out of your bag or pocket or whatever you’re carrying it.
In but anyway, let’s talk about price. This sells for right at four dollars on amazon, actually less than four dollars at the time of filming this, so really good, four dollar sharpener. That has done tremendously well. On my knives, like I said, I’ve tried it with a couple different knives. I tried it with my more knife. I tried it with my kershaw, my edc knife and a couple other little cheap knives. I’ve tried it with and it worked really really well.
So, if you’re interested in me showing like a close-up breakdown of all these features and kind of just a short video drop it in the comments- and let me know- and and I’ll gladly do that, because there are a lot of sharpeners similar to this with the same kind of design out there on the market and if you don’t know exactly how to use one. Let me know I’ll show like a little tutorial how to use this and the results so check it out.
It is work sharp. This is the pivot. Now they have some bigger versions, but this is the pivot and it is perfect for edc- and I picked this up because it was four dollars and picked it up on amazon there’ll be a link in the description. If you want to get over and check out the listing, maybe check it out see if you want to make the purchase yourself, but really really good tools so get over check it out, like I said, links will be in the description check out my website.
If you like this video make sure to hit that thumbs up button make sure to hit subscribe. If you haven’t already uh, this video will be going into the playlist for edc stuff uh. There are some other sharpeners in there. There are uh knives and all kind of stuff dealing with edc gear. So this will be in that playlist and yeah. That’s all I got for you today, guys check it out, keep your knives sharp check it out and until next time stay bearded get outdoors and god bless you.
Howdy y’all today we’re gonna be talking about the Pitt series from work sharp, so we’ve got our camelus servicemen’s knife. That was my uncles when he was in the army and great-uncle I guess and my dad foolishly modified in his youth by stamping off the lanyard. Was it very fright, so that was very nice smooth touch so, as you can see, it’s pretty dull there and now we’re gonna hone it up a bit. I, don’t know when the last thing this was sharpened.
It’s been sitting in a drawer for a couple years of it, so you’re pretty much just gonna set the butt of the blade in the the sharpener and pull through with, as they put it medium pressure about five times now. I’m gonna go ahead and pull through it more than that, because this knife is pretty dull, so I say we go twelve through well, try it out before we use the hone. So this paper is pretty thick but yeah. It’s having no problem come through that yeah.
So we give it two more passes and if you slide this thing to the left, it let’s just kind of wobble back and forth a little bit and that way you get a better hone on it. So, speaking of home, we’ll use the Hohner will give us five passes. Yeah, let’s go six, so pretty much the same rules apply for it and that’s just to make the blade have a little bit of a finer edge on it. Like I said this is thicker paper than most of the paper you’ll be using, but yeah.
Let’s get that nice and sharp, probably sharpen this knife has been in at least a decade, but uh I’d say you sharpen a pocketknife would be the pivot from work shirt. So this side here just diamond plated size, but this is gonna- be used for sharpening knives that are gonna require a little more material removal. So if it’s really dull and it’s got been dinged up and whatnot, so essentially your camping knife, we’re hand tools and fish hooks, run it through this a few times and sharpened up that way, I’m not gonna demonstrate it, because it’s pretty easy just run out along this side like in a traditional grindstone and for fish hooks, you’re gonna use the center slit there, and then you got the lanyard hole there.
So this, like I, said put your backpack put on your lanyard for hiking camping stuff like that right. If you watched my machete video, you might remember, I said I hate, serrated, machetes and knives and that’s true I find the serrations to be absolutely useless, but one of the applications of the hone on this is you can sharpen the serrations by putting it on the nook you want and pushing down a couple times. Well, actually, I was doing that no you’re gonna want to do it on the side.
That’s got the the indent on it. So, since the other side, I’m gonna be going on the left side, like so a few times and that’ll help sharpen your serrations I, wouldn’t expect too much out of this knife, because it’s a cheap little gas station knife I bought in Florida but uh yeah. That’s how you sharp considerations- and this applies to both sharpeners. If that last sharpener was named. Throughly thing is the m4 Sherman and, as the instruction manual had foretold, that when black wings come unfurled, the wheel will turn upon the last knife.
Sharpener you’ll ever need like I swear. This thing has got everything your traditional knife, sharpener here and honing edge same little wobbly thing on it on the bottom, for sharpening tools and for sharpening scissors here like and it’s, and it’s got this handy little design where you can pin it down on your workbench use it. That way, like I legit mean this thing’s got it all so, essentially the same thing: buck 110 made it video on that.
Go check that out we’re essentially just gonna. Do the same thing- and this thing is already a razor blade like I’ll, show you but um pull it through a few times. So this thing should be even more razor blade now yeah thanks pretty sure, but, like I said, it’s got that on it and I’ll show you this in a second and I’ll. Show you that too, okay, so yeah pick up this, and this little cover is going to be right here. You’re gonna remove it and it was pretty tie.
It took a little effort and a little Prime with a knife to get it to come loose. Then this is gonna, be popping out from in here you’re just gonna, pull it out and grab your scissors now I, don’t have any lawn chairs to show you, but you sharpen those by just putting them in the B and pull them through. However, on the scissors there’s a little nook on the left side of this thing and you’re gonna eyeball, let’s see on what side of the scissor blade the edge is, and once you figured that out, you’re gonna put the plastic up against the back of the scissors and pull through like so about five times.
It says on each side, but, however many times it’s gonna be necessary. These are pretty sharp, as is so there’s no point in me showing you the end result: you’re gonna want to put light pressure on this cuz, that’s a little more fragile but anyway. So that’s how you sharpen the scissors and when you’re wanting to put it back up, face upward slide. It in well I think cooped up apparently yeah. You slide it in like that. Then you take your cover and this might be a little harder to slide in to get out line.
Those two front pieces up push that down there. We go it’s like that see it fits nice and smooth in there, but that’s why it was harder to eat it up. Alright, so the diagram shows sharpening a axe. I, don’t have an accident I have a shovel, so we’re gonna sharpen a combat shovel made a video on this a while back. If you only go see that I’ll link it wherever I’ll link the last video I’m bit pretty much just like a traditional whetstone, you’re gonna pull these and across the stone on side, you’re supposed to pin it on the table, but it’s kind of hard for me to do, because this isn’t a table and the cameras in the way no water necessary.
That’s well, that’s good, and then, when you want to hone it up a little bit as much as you can home on an ax or a combat shovel use this little thing in the back and if you’re sharpening a larger knife, that’s gonna have a that’s, been dented up a lot and stuff you’re gonna want to use this first before you start using these pulling it up. So there’s pretty much two levels to that and that’s pretty dang, sharp and I, don’t think they have anything to hack through it inside but yeah.
That’s how you use the big grindstone on the back of it. Like I, said this thing encompasses pretty much any use, you’d need for a knife sharpener, it’s a all-around, handy guy, if less compact, but yeah I like it a lot I’ll make this short and sweet. Oh I love these things. This thing I’m off, throwing my camping bag and take with me on those types of expeditions. I guess. But you know it’s a great compact little knife sharpener and this guy’s going on the shed use him and there fix it up my tools and whatnot in the shed.
It’s you know not as compact, but it’s got a lot more abilities and it’s easier to use on the table and whatnot he’s pinned it down and the design is real. Smooth them are pretty sharp and whatnot and I’d say this one for what I? What the other is similar to this I’ve, seen on the market, I’d say, is probably a nine out of ten and act. This one’s a 10 out of 10 and yeah I love these things. These are bad to the bone backbone, but um I! Guess that’s about all I gotta say about that I, like the bank work sharp for sending these to me and let me review them and I hope this helps them out and I’ll be doing reviews on their Amazon or not, but uh.
If y’all like this, give the video like subscribe to the channel to see more content like this and see y’all next time.
Hi, I’m carl welcome back to my youtube channel. This short video, I’m going to try to keep this under seven or eight minutes, or so we’re going to look at this work. Sharp knife sharpener. This is the w s e d c, p, v p except pivot, plus knife sharpener. Okay, now I’m going to open up the back right here. I’ve already done this before and kind of ripped the instructions just a little bit so here it is, and I’m going to go over this with you.
I don’t expect you to read it: uh convex carbide, blades, ceramic home rods, tapered diamond rod, pivot response lock and the lanyard hole. Let’s go and open this thing up. I’ve got a knife here. I used on my previous sharpening demo that I did let’s go ahead and do what we can to open this thing up without ruining the package. I don’t plan on taking this back, but I’m trying to keep the package as good as possible.
Let’s go this way. Cutting away from myself. Of course, go cut this a little bit more right here. There we go here is the pivot plus work, sharp knife, sharpener, pretty nice, looking very lightweight, I’m going to close up this rod right here, got nice little places right here for your fingers to fit when you’re have it down on your table. Here is the ceramic rods and the collies. They call these the convex carbide, blades carbide and ceramic here’s.
The lanyard hole right here, and here is the serrated. Oh, I can’t get my finger up under there. Serrated rod, not serrated rod, diamond coated rod for your serrated knives, we’ll get back to this. Well, let me grab a serrated blade right here. Let’s do that! One! First! Okay, here we go. I’ve got two knives here with some serrated edges right here. This is one and this is another not sure the quality on these nice, but it doesn’t matter it’s just just for demonstration purposes.
Here we go now the serrated blades. You have your rod going to each individual and turn as you’re going along with the grind that will sharpen up your serrated edges with no problem doing each one take a while to do this, but it works and then, when you get done with that, just take the flat blade. Just do this all the way across okay, let’s get that out of the way I’ve got these three nights here and I bought at a yard sale.
I gave a dollar for all three of them. I’ve been using this one previous demos, I’m going to put this one aside: let’s use the mid middle size. One right here, get this big one. Let’s put it aside and check this out got a big old piece of granite right here. Got this knife here! Listen to this, so you can see me actually doing it. So there’s no trickery, yep, that’s dull! Now what we’re going to do is fold this back up we’re going to take this.
I don’t everyday yard cell knife. I don’t know what kind of steel it is doesn’t really matter to me because I don’t know: what’s a good steel and a badge still, I just know what what I like, what I don’t like: okay on this pivot, plus, you see this red button right here, on top it slides to the right and to the left this way and back this way, whoops there we go pretty tight on there. What that does is, if let me make sure I’m reading this right, if you’re holding it this way and slide this red button to the left, activate pivot response.
This allows the convex carbide mechanism to follow the curve of the blade and increased material removal for heavy sharpening slide the button to the right. This will reduce the material take off and is better suited for lighter sharpening applications. So, since I ran this over a rock I’m going to leave it to the left or take out more I’ll go now, you’ll see this knife right here does not go all the way to the end of the blade in here due to the waste the stalin.
The way it’s made you see right here was not does not go all the way to the to the blades one. Two. You hear the sound of that three. It sound like a file going over some steel, four five, six 8 9 10. Now I don’t know if you can see it on the camera, but I see little pieces of metal in this old dirty towel here. Yep and I did. I can’t feel where it made a difference. So right now, I’m going to slide this little red lock to the right, take out less metal, three, four, five, six! Now I’m when I’m pulling this out when I’m getting closer to the end, I’m pulling up on the blade to follow the contour.
Let’s get this, let’s give this four more times one two three four now remember: I did run this across that piece of rock okay. Let’s go over this ceramic rods right now, one two, three four: five: six: seven: eight 9 10 11 12, 13, 14 15. Let’s see how sharp it is now got a just a regular piece of copy paper. It is cutting. It is definitely cutting. So let me run this few a few more times here, one two, three, four: five: six: seven, eight: nine, ten.
Okay! Let’s try this again, definitely better, definitely better getting better. Every time, let’s go 10 more times see what happens. One two, three, four, five, six, seven, eight nine ten yeah, it’s better still, not quite as good as I want it to be, but it is a lot better than when I first started. So to sum this thing up, this was under ten dollars. I bought it from amazon or ebay. I don’t remember which one now under 10 nice little addition to your toe box, your glove box, your tackle box, whatever you want to put it in! I don’t think you can go wrong with this.
If you have one of these, why don’t you tell us how you like yours, appreciate if you leave some kind of comment below and um hit the bell you’ll be notified when I upload more videos, thanks for watching you.
Outdoors and this video I wanted to do a quick video on the work sharp pivot Pro. This is a sharpening system that work sharp came out with just before blade show west of 2019 and they sent me home with a brand new unit. So I could test out. So this video I’m going to test out some of the different features and let you guys know if it’s actually worth the $10 MSRP. This sharper has two main pull through sharpeners: a carbide, convex sharpener with the pivot function and also a ceramic hone, there’s a large pull through sharper on the bottom and this one’s made four axes.
The angle on it’s gonna be a lot steeper, so it’s going to be better for chopping, wood and things like that on the bottom of the sharpener there’s a large medium, /, coarse diamond surface. This is really good for taking out some of the flat spots and it’s also good for large blades, like machetes, there’s, an apartment in the handle which throws away a tool for sharpening pruners scissors and shears.
The first knife we’re gonna tackle is a little blade tech nice. This one has a little bit of a flat spot in the blade and the blade is made out of s30v to get the flat spot out. We’ll just start on the diamond surface, then we’ll pull through with the carbide sharpener there’s a little red switch that is towards the handle when the switches towards the handle. That means that the pivot is free-flowing and you can get a more aggressive cut towards the cutter and it locks it in place.
The pivot gives the blades a little bit more of an aggressive cut because it angles the carbide edges towards the blade locking it down. You have sort of an in-between between super aggressive and the fine honed that you have for the next step. The large diamond surface works really well for machetes, and it really cuts fast. I can imagine someone using this on a lawnmower blade.
The scissors sharpener has a carbide sharper on one edge and, on the other side, is a softer metal with a rounded surface and this axe more of a guide than a sharpener. They really thought it through when they designed the sharpeners further the scissors, because the handle is skeletonized which allows you to access the whole cutting surface at the right angle. My fine axes have a shallower angle than what this cutter is designed for, but the tomahawk works pretty well for this.
We’re just gonna treat the edge a little bit from all the abuse it takes, so that is it for the work, sharp pivot Pro. This thing is pretty cool, and you know for me: I would say it is worth the $10 MSRP. Obviously you’re not going to use this for really high-end knives, because most people that have high and knives prefer a standard sharpening versus a pull-through which can give you less than perfect edges, but I think for the use of the cabinet, where I’m going to keep this or at a workshop right on the bench, where you’re going to be sharpening a lot of tools.
I think this thing is pretty badass. If you guys have any comments or questions, you can go ahead and message me direct through Facebook, Instagram or through YouTube, or you can go ahead and comment down below. If you guys liked the video please like share and subscribe and also check out my Facebook page social media and all that fun stuff, but as always take it out there bye.
Today, I want to find out if the new work designed for your everyday carry sharpening system and knife maintenance needs. Well, that’s right, folks, welcome back to another video here at Gideon’s tactical thanks for joining me today and I’m, looking forward to having some fun with you to check out this little micro sharpener from work sharp. Now, if you’ve been following a channel for any length of time, you know that one of my favorite ways to maintain my edge tools are with work.
Sharp products I have purchased so many of them over the years. I have their belt sharpeners for my larger tools or for reprofiling needs and then I have their more compact filled sharpeners for my survival kits that I use a lot and they bring a great value to performance level. Well, they’ve recently come out with a new additions to their budget-friendly options for sharpeners and I picked up this micro sharpener, and it really intrigued me because not only was it rather inexpensive, it’s really compact.
It has a diamond and ceramic rod, but then it also has these torque bits to help maintain and work on your knife. So today, we’re gonna break down the system to show you what it has to offer we’re gonna resharpen one of my pocket knives work on it with the torque bits and just talk about whether or not this is. This is a perfect addition to any sort of EDC system. When you want to be able to maintain, particularly focusing in on your pocket, knives or multi tools, so Before we jump into the functionality of this, and how is the sharpen? How does it you know, work on your tools and those type of things we’ll just give you some really quick dimensions.
It’s gonna weigh 1 46 ounces, so this thing weighs next to nothing. It has a maximum thickness of 0 3 9. So nice and slims got that little lanyard hole comes with that little lanyard. We need to put carabiners through there paracord, whatever you would like to lash and attach two different things, so you don’t lose it and then it’s two inches wide 2 25 inches high, so I mean this thing is really compact, really small me.
It just fits in the palm of your hand, so the sharpeners themselves. We have a diamond stone, that’s about an inch and a quarter long, and then we have a ceramic rod. That’s about an inch and a quarter long now, I’m going to start out with a damaged bushranger light right here from cold steel, I rubbed it on the concrete just a moment ago, to give it a pretty gnarly jacked-up.
As you can see there, whoa yeah, not good, not a good edge. I, don’t know how! Well you guys can see that there it’s got a couple. Burs couple rolls because I scraped it on the concrete, so we’re obviously gonna start on the diamond stone work. Sharp recommends ten passes, I like to do it this way, one at a time, instead of like five on one and then five on the other again trying to do the best I can keeping this all in frame and everything else.
It’s you guys. It does have a guide. These little ramps here, they’re angled, according to the website at 25 degrees, is what I was reading so I, don’t really use them, I, just kind of eyeball it. This is about a three and a three point. Three inch overall blade, eight CR, 13 MOV, so an easy steel to work with that’s why I’m doing it on film with you, I have used this once or twice with other blades as well, a more premium material and I, normally I.
Don’t let it get this bad where it would be. You know having these chips and rolls unless I was like just totally thump innominate, so I usually just be using the ceramic rub: it’s nice that has this diamond stone! It’s pretty easy to manipulate! It’s gonna! Be careful! You know you don’t want to slice your thumb or something like that. So just do it slow, be safe and conscientious.
It is nice that they have these little cut ends with the jimp just kind of give you some extra texture and grip. Now about a three and a half to four inch. Knife is about max that I would would say that this small, a ceramic or stone you know or diamond stone, could handle I would not be. You know trying to do my machete. You know with this or something like that and a pinch.
Obviously, you can do it with almost anything, but it’s more conducive to pocket, knives or and or small fixed blades ooh nice I’m pretty happy with that. Let’s see what happens. Oh yeah, nice much better. That was just with basically two passes. What I normally don’t do paper test? Cuz I, don’t like doing paper test, but in this guide you go by touch, but you guys can see they’re nice.
So it’s absolutely doable to tune up. You know blades, particularly if you’re using the ceramic gratin. In a pinch, you can use the diamond stone to take out a burr, a little chip. So one of the things that sets this apart from just being a normal sharpener is the fact that it does have some torque heads in there to be able to adjust a lot of your pocket knives. Now it has a t6, t8 and t10 Torx screw, so those are mounted inside this little polymer sleeve.
That kind of rests right in here. It’s just pretty! Well in there you just pop it out pick the one you need we’re gonna adjust this pocket clip here, real quick. So that is the t6 I believe yep t6, then there’s a little magnetized mount right there. You can see the magnet right in there. You drop your bid in just like that. Sits nice. There, you have it, so this makes it very easy to realign maybe pivots that have gone on on the linemen kind of wacky to tighten up your pocket, clip that some, maybe over time, gets loose or readjust, swap the pocket clip for a friend.
You know they’re a lefty or something and they don’t have a Torx bit on hand. This makes it very easy to do and it makes this a maintenance kit for your pocket knives, not just a sharpener, which is a really cool plus for the price to the size and footprint and weight. That’s offering so I will touch on price here with you, ten bucks, it’s kind of a no-brainer for what you’re getting the ceramic, the diamond, the Torx I mean the Torx is set alone, is about like eight bucks.
If you go somewhere and then, if you try to get ceramic rods or diamond rods, I mean it just makes a lot of sense. So I will links for you. Guys I bought this over bleach cue for that ten Amazon blade HQ gpknives. We appreciate when you purchase your gear purchasing decisions with the hyperlinks that we offer to you as well as over, to knock around sunglass company 511 tactical mystery ranch, all the stuff, that’s out there that we have in the description below and those hyperlinks.
We really appreciate it and I want to give a shout out to our paypal supporters as well. Those of you support through PayPal. You are amazing. You helped me buy gear just like this, so even that five ten dollars a month or whatever you know as easy for you can help me, continue to make content, buy gear and do videos just like this. Well, there you have it folks I got to tell you for me: it has become a perfect addition to my everyday carry system.
If you recently were watching the channel, we did an update on my EDC pouch. That goes with me in either my messenger bag. My backpack, when I’m going around town whatever and I, was using their mini sharpener I. Believe it’s what our pocket sharpener there I was using there $15 pocket sharpener, which is decent but still got a pretty big footprint. Some of you guys suggested this I went over picked it up and it now is going in the pouch, throwing it right there on the lanyard with the house key and it’s gonna take up way less of a footprint, basically for the tools I’m using drugs.
If it’s the pocket knife in here, the Swiss Army knife ordered my other pocket knives, I’m easy seen for the day. It’s gonna be able to maintain any of those plus the added bonus of the Torx screws that I did not have or spork drivers, but I did not have in the system before so. It basically just became a two-in-one addition to my EDC pouch. So that’s the value level that I see in it.
I hope that you guys have been able to see whether or not this will bring value to you. If it’s better, just to stick with the bigger $30 filled, sharpener I love that thing that’s in many of my bigger you know like camping and outdoor kits or if this really fits a niche. I want to hear from you guys what do you think about this micro sharpener and whether or not it’s something that you’re looking forward to and what type of experience you’ve had with it if you’re a current owner of that product so guys? Thank you.
So much for checking us out check out the other video popping up subscribe. If you’re, not a current subscriber check out, what’s going on over on Facebook and Instagram, throwing up there all the time and always remember, stay equip stay prepared and we’ll see out there.
Smith’s CCKS 2-Step backpacking knife sharpener
.01 Pack (Yellow)
- Crossed Carbide Blades Provide Quick Edge Setting
- Crossed Ceramic Rods Provide a Razor Sharp Edge
- Preset Sharpening Angles Provide Guaranteed Results
- Non-Slip Rubber Feet for Added Safety.
- Excellent for use on all types of knives, especially filet knives
- backpacking knife sharpener
- Brand: Smith’s Consumer Products, Inc.
- Color: .01 Pack (Yellow)
- Item Dimensions LxWxH: 39.37 x 39.37 x 39.37 inches
- Type: backpacking knife sharpener
Review of the Smiths CC KS two-step knife sharpener, it’s made from this company Smiths, which is a company, that’s known for its products regarding knives. It comes in in this box here, so this two-step knife sharpener has instruction is in the back in three languages and shows has figures of how you should use the knife sharpener.
Now, as you can see, it’s a small, our TM sharpener usually used for knife, sharpeners and aluminum oxide stone kind of like this I use this stone for sharpening my knives, but as I found out it’s a hard process and it takes a lot of practice to do it right and it’s difficult to find the correct angle in which you will cross the blade on the stone.
So I pick up this thing here, which costs around ten years ten dollars, maybe you can find cheaper. Also, there are a lot of the imitations of this knife sharpener, but I pick this one, because it’s made by Smith’s and I was afraid there would be something and the Chinese products like this with the angle of these two ceramic rods of this carbon also has rubber pads.
It’s very small, as we said before, and you just put it right here on stay a stable surface on the table, perhaps and put take your knife and with a few soaks you get a knife sharpening now, as I’ve seen in other videos. You probably don’t want to use this carbide rods, except if your knife is very dullness or the bad very bad shape, because if you have a knife, that’s not very dull- and you use this thing here- you will probably ruin you get dad’s of your knife, so we use the ceramic rods on the bottom here and with just a few strokes.
I would, as I’ve seen with other knives of you if they become really sharp. Now, let’s take an example here, I have this Swiss Army knife with which I have not used for quite some time. The edge is not very sharp I’m going to do a knife test and, as you can see, as you can see, barely cuts paper now we’re going to as it says here in the instructions.
I don’t know. If you can see that it’s in Spanish here, let’s try it in English. It says that a reason shopping may require six to eight pulls the fine ceramic, it’s okay, so we’re going to try it six to eight poles. Let’s see, as you can see here, the rods were white in the beginning, but I’ve tried with a few of my knives and they’re becoming black here so, but it still works so we’re going to try it here, I’m going to take the knife and without using too much force I’m going to do it eight times, probably ten and voila the cut.
So although we used it more than eight times than the structure says, we’ve used about fifteen times, it’s still a lot easier than having to sharpen it with this stone. Although this is better for separating knives and it’s a lot more compact than a sharpening stone, you can put it in your pack well, most weeks about very little compared to a stone and it’s something you can have it on you on your camping trip and it can be really useful for daily knife sharpening anyway, thanks for watching, please like and subscribe.
Hey there, everybody getting is tactical here: I just wanted to do a really quick review for you of pocket sharpener that I love that I’ve had now for probably smen, since I got into knives, probably close to a decade and I just love this thing: it’s the Smiths Smith’s turret down here, Smith’s. If you can see that hopefully two-sided sharpener, you got the coarse carbide V and then you got a ceramic fine V.
Those are the two things you get it’s about, I, don’t know two and a half by two and a half inches rubber on both sides, kind of keep it from going around lanyard hole, some good texture here on the other side. Just so you can get a good hold on it, and this thing does amazingly well for such a small about five dollar item. You can pick this up it for about five dollars or less at Walmart or any sort of sporting goods store, and these things work great they’re great for your bug out bag.
They’re great, for you know just a light pack if you’re doing light backpacking like a lumbar pack like the mountain Smith tls, you know over your shoulder type of bags. You know and don’t want a whole huge kit. This is out in the field type of use or around the house. We actually used a much larger three stone Lansky system and we weren’t able to get a good edge on a SOG seal pup like we wanted to, and then we finally ran it through the ceramics up here and it got the edge that we were looking for.
So this is a great little guy for certain things. Just kind of show you here we got a tack, one fixed blade point: nineteen inches thick I mean this will definitely do any type of pocketknife and most of your fixed blades as well. So if I had really jacked up my edge, you know I got some chips or rolls in it. Then I’m gonna want to start out with my coarse carbide. V I’m, just gonna put it right in here and you would run it along.
You know just following your knife edge. Obviously- and you just go through it, I just resharpen this one, so I don’t want to jack it all up and start all over again, but you would just run through it with a little bit of pressure. You want to be pushing really hard like mmm trying to pull through it. You just kind of let it go. Do its own thing, maybe put just slight pressure on the blade and to go through and probably run it about ten times through there.
Then you flip it over go to the ceramics and the ceramics. You just run it right through there. You can hear it with just a little bit of pressure and do about the same thing about 10 runs and I guarantee you that unless it’s really really bad, you will have gotten your knife, definitely back to a usable edge and if you know you just have maybe some slight dulling, maybe just some burrs on your belly of maybe your fixed blade, or maybe you know, I just did this yesterday with my bench made full-sized reptilian, you know, I just had a couple, little tiny burrs on the belly of the blade, so just ran it through the ceramics just to touch it up and got it right back to almost factory sharpness, and you know maybe 90 seconds.
So this thing is great for both fixed blades and pocket knives, the Smith’s, double-sided, fine and coarse carbide and ceramic knife sharpener. You want to pick one of these up. They will help you out immensely with your sharpening needs. So thanks for watching stay equip stay prepared and we’ll see you out there.
Here reason why I’m here is for this guy here is Smith’s pocket pal knife sharpener. This is a really essential tool to everywhere. You go if you carry a night, I’ll be pitching a 10 here. In a few minutes, I felt like this was a really cool opportunity to do a gear reviews. Knife sharpeners, really awesome. It’s portable I keep one in my glove box. I keep one in my easy bag anywhere. I go you’re, not likely to find one on one of these assault, we’re pretty close and a piece of paper here.
So I’m cutting stakes for my puck tack. This knife is really dull. It will not penetrate or cut this paper I’m using a lot of downward force and while trying to share this paper, I finally was able to break through, on a paper son like to get into a quick demonstration on how to use this portable knife. Sharpener I’ll show you that once I put the edge back on a knight at this point, I’m just gonna demonstrate using this tool.
This is a three-in-one sharpener. You have a car, buy. You have a ceramic. If you have a serrated blade like this, you have this diamond right for sharpening your serrations earlier I tried to cut a piece of paper with this blade. I’ve been using this to cut up tent stakes for a pup. Tent displayed is extremely dull, so let’s get a nice edge back on his blade. Gonna use the fine portion of the sharpener in the way you use it.
Is you place your knife in at an angle, tip down and you just ride it along to sharpener to get your edge back on there and what I’d like to do is I’d like to make about six to eight passes, to get that nice sharp edge back on the knife again, I am using a fine portion of the sharpener, and it’s fine portion is just to get an edge back on your blade. If you were using a coarse portion, this is for a damaged blade or extremely dull knife.
You take and I use the coarse portion. If you were to break one of your serrations like you dropped it on a curve and it broke a portion of the blade. Then you use the coarse portion of the sharpener to put an edge back on this blade and reshape the blade. Essentially, so, let’s make a few more passes to get the edge back on this knife. Let me demonstrate how to use this diamond coat at raw. You take the diamond coated.
Rod hold it at about a 45 degree angle and, as you push it down the serration, you rotate it on your blade. This is how you get that nice edge back on your serration. You just repeat this I’d say about three to four strokes per serrations. Typically I’ll be Fox with tanto style, a wood serrations for my Wharf knives, because it’s a great utilitarian type of knife to own. You could use the type of Horsham of this blade for self-defense and you could use the serrated edge for making deep cuts in a working environment.
I just put that edge on here. Let’s test it out on some paper now see if I could cut this paper, no problem whatsoever you guys saw earlier I- was not able to make these types of cuts using this knife 9 to 15 dollars. It’s more of a practical, everyday price that you should be able to find this knife sharpener, for this is a really great filler gift to throw in a gift bag. You know somebody have a birthday if it’s a holiday, it’s a great, really inexpensive item to give the night lover in your life great to keep in a glove keeping an EDC bag, keeping a center console of your car.
If you carry a knife, this is a must-have item, it’s portable, it’s inexpensive and it works, but it’s review on a Smith’s pocket knife. This is a really awesome piece of gear. I’m gonna, give it two thumbs up, really great, buy, really inexpensive, very portable, and it’s just great for all knife lovers in your life, your military, the ninth enthusiast: it doesn’t matter, it’s really awesome easy to throw in a center console glove box.
Edc back and closing I’ll forget to thank your local first responders, who that multi-well it now and your local military personnel don’t settle to American heroes. It’s the better, no problem whatsoever.
I guess you could say a review of a sharpening implement um, I’m not even gonna put this under my sharpening up series of videos, because, quite frankly, it’s not something that I can wholeheartedly recommend for regular use and I’m going to tell you why. First off it is this smith’s pocket, sharpener where’s my focus zone there, it is um, yes, the smith’s pocket pal um sharpener and, as you can see it’s one of these standard ceramic and carbide pull-through sharpeners.
Now anyone who’s into knife, collecting knife usage um. Basically, if you’re a knife fanatic like I am, will tell you to never ever ever- use one of these um, whether it’s smith’s gerber any company. Any design like this not to use it. Basically, because these will chew up your knives, they don’t provide a really strong edge. They may get it temporarily sharp, but the edge they provide is thin.
It’s jagged, it’s fragile! So really these are not the best type of sharpener to use. Now, when I first got into knives, this was the first sharpener I bought just because I didn’t know any better. I didn’t have the skills to really sharpen my knives, like I do now, so I bought this and I still kept it and now this goes in my car emergency kit. So in the limited role that I keep it there, this is an excellent tool and I’m going to explain why that’s why I’m basically giving this little review here in that limited use role for the tools that I have in that emergency kit.
I keep a lower quality multi-tool. I think it’s a sheffield branded tool and a lower quality knife. You know nothing spectacular and the hard use that I could expect to put those through if they were to dull on me, um, I’m not going to have the time or I can assume the dexterity to take out, say some ceramic rods or you know another type of sharpening kit and re-hone those knives um.
You know in in my backpack in other places I do keep you know, small ceramic rods and whatnot just to touch up edges if I really do need to, although in my normal everyday carry use, I really don’t. I don’t abuse my knives that much that I’ve ever found them to dull on a day-to-day use, usually just at the end of the day, some strawbing will take care of any damage that I put into the blade, but those tools that I keep in that particular kit.
I can assume that if I have to use them, I’m going to have to use them hard and there’s a pretty good chance that they will dull, because you know they’re, not the highest quality materials. Obviously, and I generally prepare that kit for cold weather, because around here in western new york, I assume that if something’s going to go down where my car is going to be in trouble- or you know a bad accident where it will occur, my car is going to break down whatever it’s going to happen in the winter.
So that’s the quote, unquote disaster that I am preparing for um and as such, I’m assuming I’m going to be in gloved hands it’s going to be cold. You know I’m going to lose some dexterity and I am not going to have the ability to take out ceramic rods and do perfect. You know angled strokes. Therefore, a tool like this is perfect um, given that those you know the knife that I keep in there and the multi tool, with the blade that I keep in there are essentially disposable items anyway, I don’t care the condition of the edges um on those you know, I don’t care if I really them up essentially so really.
This is the perfect little tool for that that bag. It weighs next to nothing. It doesn’t take up a ton of space and over the years that I’ve used it. I’ve found that it doesn’t really do too much damage to blades um yeah. The carbide will chew up your blades, it’s gonna rem. Well, I shouldn’t say that it will remove a lot of metal um, but the angle that it’s set at it’s not like it’s going to totally destroy your blades over time, you’re going to lose a lot of metal along your edge.
But if you just constantly use the ceramic to re-hone and touch up your edge, you should be fine, I’m not exactly sure which edges or which edges which angles these are set at. It’s probably about 40 degrees, uh, maybe a little less, maybe a little more. But overall, I found this to be a very high quality tool. It also that’s one of the reasons I like it comes with a small diamond rod here, and I found this to be really good for touching up and maintaining serrations.
So, whereas most of the ceramic rods I have are too small to get into really deep serrations. This thing: does it just fine- and I still use this to touch up my the very few serrated knives that I own. So at the time I bought this, I think I found it at walmart for maybe 10 bucks. It’s still about that same price. I think, and now most people know how to use this, but I’ll just demonstrate a quick um with this really cheap, crappy pakistani pen, knife um, so cheap and crappy.
In fact, you can see there’s a distinct curvature to the back spring, I’m not exactly sure how safe that is, but obviously I’m not going to use this on one of my better blades I’ve kind of evolved past that, but let’s check the sharpness of this now just on some lined paper. So as you can see it’s okay, but we’ll see if we can make it better, just a couple pulls through the carbide and touch up on the ceramic.
I have no idea how well it’s going to work on this cheap steel, but we’ll see there we go so I mean yeah and it feels sharper than it obviously seems to perform. But this knife was probably a very poor choice to demonstrate with, but in the limited role that I keep this in, it performs very well if you’re going to use this to maintain your general use pocket knives. I would highly persuade you to find another option.
You know the lansky turnbox, which is what I use for my regular sharpening needs, combined with a straw, man strapper, just any leather strap with that you have a sharpening system that maybe costs 30 bucks. You know you could upgrade to maybe a spyderco sharp maker. You could do any number of more proficient and less damaging sharpening systems um. But if you’re looking for something small and cheap to throw in a kit um that you don’t mind, you know possibly causing some damage to the blades of your knives.
The smith’s pocket pal is definitely something to look into uh. It’s higher quality than some other pull-through sharpeners that I’ve seen, and it has that diamond rod on it, which, I think is definitely you.
Work Sharp Guided Field Sharpener backpacking knife sharpener
- COMPLETE KNIFE SHARPENER – field, home or shop use designed for sportsmen who need a complete, compact field sharpening solution. The diamond plates can be easily removed to expose a broad head wrench to speed sharpening in the field. Diamond plates can be attached with the abrasive exposed or flipped over during transport in your gear bag.
- DIAMOND PLATES, CERAMIC RODS, LEATHER STROP, & SHARPENING GUIDES – provide a fast, easy & consistent sharpening solution for knives & camp tools. The ceramic honing rod rotates to expose coarse & fine honing surfaces, as well as a grooved surface for sharpening fish hooks. A second, small ceramic rod is used for sharpening serrations
- CONSISTENT BLADE EDGE ANGLES – purpose built 20° angle guide for sharpening with the diamond plates, & 25° angle guide for honing a strong micro-bevel. Five abrasive steps provide a complete sharpening solution: coarse & fine diamond sharpening plates, coarse & fine ceramic hones, & a leather strop.
- COMPACT & DURABLE – maintain your edge while out hunting, fishing, camping or anywhere you need a sharp edge. All elements are self-contained & require no tools, assembly, or set-up
- PROUD TO BE AN AMERICAN COMPANY – This tool was engineered and assembled by hard working Americans. Work Sharp is part of Darex, a 4th-generation family owned company in Ashland, Oregon. For over 40 years we have been creating industry-leading sharpening tools here in the USA.
- backpacking knife sharpener
- Material: Diamond and Ceramic Sharpener
- Brand: Work Sharp
- Color: Gray
- Item Dimensions LxWxH: 6.75 x 1.5 x 1 inches
- Item Weight: 2.5 Ounces
- Grit Type: Fine, coarse
- Type: backpacking knife sharpener
Glib from 50 campfires today we’re going to be talking about the work sharp field sharpener. So what I think makes this a pretty unique sharpener is the fact that it runs up through five levels of sharpening on top of that at every single one of those levels. There is an angle guide, so you know exactly where your blades at and that you’re getting the most precise angle possible, which they have set at 20 degrees, which is pretty common for for outdoor knives, camping knives, so get right into it.
So we’ve got one side here we start out at 220 grit, that’s not something that I would use on any of my blades. That’s pretty rough! If you needed to read profile a blade or it just is dollar than dull. That’s you could start there flip over and we have 600 on the other side. If, if you have a knife that you haven’t touched like I said, touch it a little while and then and want to put another edge on it probably start there they’d be a good place, and then we flip flip it over onto next step up would be to the there’s a coarse part on the ceramic rod.
So you move into that. Then you can turn this over to the smooth side of the ceramic rod, and those of you that have sharpen with ceramic rods before I know that you can get pretty big sharp with just a ceramic rod and you could even you could stop right there and you have a sharp, very sharp knife and sometimes I do if I just don’t have time to do the last step, which is stropping.
They have a lot of strop on the back side of it and that halves has some micro abrasive compound that comes built-in to it. So you can get a pretty a pretty sharp hair popping sharp polished edge on your blade. Every single one of these levels of sharpening has the angle guide, which I think is. That is the thing that makes this also a very unique sharpener.
So there’s a little thumb grip here. If you were going to use it in the field you can kind of makes it really easy to hold it, and so each time you run across here, you can use getting you’re getting that start with with your edge. Another thing I like about it is that this with its rubberized on the ends here.
So if you are at home or if you have a picnic table, this doesn’t really move anywhere. So if you do want to set it down and kind of run sharpen, let’s do it more of an angle away from here. You can do that as well. Ceramic rods, also once again 20 degrees on both sides, pretty awesome, and then the strop even has even has angle guides as well on there.
So it kind of gives you an idea where to start, but once you get that going, then you kind of just keep back and forth a couple. Other features that it has that I want to mention. There is a little tiny ceramic rod on the on the edge here for sharpening serrated blades, which is awesome. So if your pocketknife has is a serrated one, you can kind of work through that all the way and you can sharpen those up pretty slick and then there’s also doesn’t a lot of things.
I’m like keeping all this in my head. So don’t forget any there’s a groove, as you can see here in the in the ceramic rod. That’s for sharpening fish hooks, so pretty sweet. You have an old daredevil or an old spoon that needs some touching up. You can run them through there and get them nice and sharp again and start casting.
One last feature that it does is that these these diamond coated plates are magnetic there’s a little magnet on here and on the inside of this, for you bow hunters out there yeah is broad head wrench, pretty just just to kind of a clever thing to to throw in the mix. Does it take up any extra space? They just did a little stamp out here.
So we have four head. Four sided brought head and three sided broad head, a four bladed three bladed yeah, so you can just unscrew those touch broad heads up with this as well. It’s a great piece, I think it’s it’s. The one I grab the most often I have a couple different types of kind of portable field sharpeners at home, but I like that everything’s in one in one piece here.
I have some rod sharpeners at home too, and they work great. But there’s no setup on this thing. You just grab it and you start going and it works. It works really really well, so, hopefully, that’s helpful and helping you decide if it’s something that you want to add to your pack or start bringing into the campsite.
That’s the work, sharp field sharper.
How I shop nice on the workshop got it filled sharpener after the demonstration of this years ago, I’m just gonna chop them up. One of my knives here place your knife with the flat part of it against these guides and slide it down till you hit the sharpening surface and then you just follow out and I go back and forth and meet back up here. This is the coarse side. So this is the side that you use to re profile.
The snipe doesn’t need a lot of rate profiling because I am at 20 degrees. I’ve had the workshop got a few chop now for over four years by now- and it’s probably one of my most used sharpening systems, if not the most used sharpening system really I don’t need the guides, so you don’t have to use them. You can get just leave out the guards. If you want a different angle or you’re, confident that you can hold the angle yourself, you don’t have to use them and I’m so used to sharpening to try to degrees that I usually end up sharpening to that degree anyway, because 20 degrees really is a great angle for a user knife, it’s strong 20 degrees, don’t have to worry about having a weak edge, but it’s still sharp enough to do your general cutting tasks.
I already got a burr can actually see the burner. I think you can see that there, my nail hangs up on that. That’s it Barrow forming, got a burner all the way around so I’m switching sides. This is a little bit awkward because I’m doing this around my camera and I just occasionally go back to the guard to see if I’m still at 20 degrees, which I’m usually not, but it doesn’t really matter.
The precision of your angle has very little impact on the actual usability as long as the angles actually meet. I already got a burr on the other side and I actually I use soapy water. As my lubricant for this, these stones do work without a lubricant, but it’s better to use them with because they wear out quicker. If you don’t use a lubricant and soapy water in general or soapy, water is what I would recommend it and lubricant for Diamond stones.
There are other things you can do. Windex and stuff like that. Some people even use wd-40 si a lubricant as long as there’s something carrying away the metal particles at least a little bit. You are usually fine. This is kind of awkward because of these some studs I. Just do it free and Liber shopping. You can just alternate but birth sharpening. Is it’s a little bit easier? You just shop until you can feel the burn on the other side, and once you got that you switch, you can alternate.
Your strokes just means it’s a little bit harder to feel when the apex is actually forming so I just work. One side till I got a burr all the way before I switch around and the ceramic rod that will come to will actually actually remove that burl. Once you got it, so you don’t have to do. Bear removal on the stones itself, for some reason where it doesn’t want to come up, might not be hitting the apex right, maybe I’m doing something wrong.
No, no, it’s done form just takes a little bit longer than I anticipated. This is very bad steel. This is a gentle g7, 1/7 and 440c, but the performance makes me think it’s either the worst heat treatment of all time or nor 440c, because this thing doesn’t want to hold an edge, because dole very quickly has very low toughness. I did some toughness testing that I never posted, because these Steel’s underperformed so much this 440c did seven cuts were some power was some power supply wire and Spyderco HD, a certain mov? We did like 37, so this steel is very much underperforming.
That’s why I have to sharpen it so frequently because I actually use my knives not a lot, but I do use- and I don’t just post instagram pictures time to feel a burn. I’m switching might have to reapply my lubricant these some starts. Are me up right now. That’s the angle that a performed so a little bit of a quick tip. If you want to clean your ceramic rods, heart like school erase that you used to rim to erase pencil works to clean this, you can also spray it down with wd-40 and scrub it, but you don’t have to do that super often these come with guides as well.
You can use the guides or you can do it. Freehand I use the guides more as an orientation point, as you can tell you don’t want that to happen by the way I just slipped off here, and you immediately hit the side of the diamond plate. That’s one of the bad parts of this and you chip your blade. You want to be a little careful when you’re going that way, because the diamond plates stick out so much that you end up hitting them you’ll see edge, feeling it’s there it’ll work.
Let me feel it more precisely without reaching around not quite hair popping, let’s see if I can get it to there with a couple more passes by the way um the plates. It’s not really stated anywhere what grid these actually are. I just washed this all this water everywhere, but from the feel of it, comparing it to other diamond stones. This is about 300, and this is about 600, and this time this ceramic rod feels exactly like the Scarpa ceramic rob that I have for just about 1200 grit, so I’m guessing this is about the same, which is a decent grid for finishing, like 1200 grit is enough to get a working edge.
The steel is absolute. It doesn’t even want to take an edge, no, but we’re getting somewhere it’s taking yeah by now. So finally, this leather strop here I’ve got this loaded up with a power red compound which is about 4000 grit stropping compound grits, don’t quite work like stone grits, but you can use those grits as a general idea where you’ll end up and I have very good experiences with the Scarpa Scarpa is the in-house brand from nice and toots calm.
They have a couple of different sharpening equipment stuff under the name and it’s generally fairly good but inexpensive to stuff. My Arkansas stones were from Scarpa. My ceramic rod is Scarpa ceramic rod and the components that I use Scarpa and I’m- probably getting some water stones from that brand as well, so that brought the dash off quite nicely something to wipe it down.
This knife wasn’t totally dull, but I felt glad doing this. Quick video for you, quick SM, ten minutes and I just saw let off the extra compound. I barely have any hair left see it’s taking here. No, it’s super sharp, but sharp enough. So yeah. Let’s, how are you shopping on the workshop guided Futurama? You can of course put in a little bit more work and working this around the camera is kind of awkward for me, so I could have probably gotten better results, but this is sharp enough to cut open boxes.
No problem, and most of us don’t do a lot more with our folding knives, so that sharpness really is enough, at least on this cheap knife planned schedule. If this was my spider, cool spider, chef, I wouldn’t have done such a good job on sharpening anyways, just a quick lazy sunday, video sharpening a knife I hope you enjoyed this my channel subscribe and see you again folks.
Sharpening your dull knife just became sharpener five sharpening stages and built-in angle guides. Allow you to restore your blade edge quickly, consistently and easily. The compact size makes it portable, so you can stay sharp on your next outdoor adventure. Like other works, sharp products, the guided field sharpener, is packed with features. It was designed specifically for your sharpening needs to restore a dull blade begin with the coarse diamond to repair any damage in the edge progressed to the fine diamond to refine the edge to do so.
Rest, the blade on the guide and push along the abrasive after five to ten passes per side use the fine ceramic rod to hone the edge for another five to ten strokes. Finally, polish, the edge with the leather strop to sharpen serrated knives nest, the beveled side on either the small ceramic rod or the fine side of the large ceramic rod, cushion pulled back and forth for several strokes per serration for curved blades, begin sharpening on the coarse ceramic rod.
After five to ten strokes progressed to the fine ceramic finish, the edge using the leather strop, the guided filled sharpener can sharpen a wide array of camp shop and garden to us. A few passes on the fine ceramic will quickly restore the beveled edge of scissors. Fish hooks can be resharpened on the ceramic rod. Using the fish hook. Setting hatchets and axes can be sharpened. Using the coarse diamond rod, heads can not only be sharpened, but can be assembled using the internal wrench.
Sharpening your dull knife just became sharpener five sharpening stages and built-in angle guides. Allow you to restore your blade edge quickly, consistently and easily. The compact size makes it portable, so you can stay sharp on your next outdoor adventure. Like other work, sharp products, the guided field sharpener, is packed with features.
It was designed specifically for your sharpening needs to restore a dull blade begin with the coarse diamond to repair any damage in the edge progressed to the fine diamond to refine the edge to do so. Rest, the blade on the guide and push along the abrasive after five to ten passes per side use the fine ceramic rod to hone the edge for another five to ten strokes.
Finally, polish, the edge with the leather strop to sharpen serrated knives nest, the beveled side on either the small ceramic rod or the fine side of the large ceramic rod, push and pull back and forth for several strokes. / serration for curved blades, begin sharpening on the coarse ceramic rod after five to ten strokes, progress to the fine ceramic finish the edge using the leather strop, the guided filled sharpener can sharpen a wide array of camp shop and garden tools.
A few passes on the fine ceramic will quickly restore the beveled edge of scissors. Fish hooks can be resharpen done. The ceramic rod using the fish hook, setting hatchets and axes can be sharpened. Using the coarse Thailand rod, heads can not only be sharpened but can be assembled using the internal wrench.
Hello folks, California a sunny day at the beach wishing you were here, but tell you what we’re going to show you actually one of the products that work sharp makes, and so here we go. It’s the guided field. Sharpener. It comes in a package like this I’m not going to open the package, but I’m going to show you that you have lots of information here.
I do want to point out. It says: watch demo! If you have a QR code reader on your smartphone, you can watch this or if you go to my website, work sharp, easy calm. You can watch the video for the sharpener, it’s all set up there and it’s the demo, video from the company itself, I’m going to show you my version of this training, video as well, but I’d recommend you watch both of course you’re watching this and then go in that watch out more -.
Okay! Now here we go it’s a handy little sharpener, because it’s as you notice not plugged into anything, it’s no electricity required. You could take it with you on your hunting or fishing or backpacking, or into the woods into the beach. Wherever you go. It’s nice. It fits in your bug out bag or your field pack, your day pack or your pocket all right and it handles a lot of stuff.
It says on here you could do your knives, your scissors, your serrated, knives, fish hooks, you can do outdoor or kitchen knives, you could do axe and shovel and all kinds of things. So we’re going to show you a little bit of that. But ok here we go. Let’s take a knife. I got a few here, but this is obviously an outdoor knife. Let’s pretend that it’s nicked or damaged it’s not, but if it were, then you would want to start with this course diamond plate.
As you notice on your sharpener. You got course diamond and fine diamond and then you’ve got this ceramic crock stick. It’s got a little red knob down here that you rotate and it’s got different positions. It’s got what will go into this, but on a knife, that’s damaged. You probably want to start with the coarse diamond plate and you’ve got a 20 degree guide.
It says that’s a shoulder here, so let’s pretend we’re out at the beach and we need to sharpen this so we’re going to drop it down on that yellow, shoulder and then draw the knife across like this into the tip into the tip into the tip. You notice I’m, coming across keeping the blade itself in contact with the plate up into the tip right there, and then we did 5 on that side.
Let’s say so: let’s do 5 on the opposite side of the night, drawing it across drawing it across drawing it across there. You go ok, so what we’ve done is cleaned up that edge taking the nicks out and so forth. It does give it a bit of a rough edge. So so then we would next go to the fine diamond plate and do the same process it’s much smoother.
In this case, you can either go five on the left and then five on the right or you can alternate like I’m doing right now and come back and forth and you’ll feel a total difference. It’s a much finer plate and this is taking the knife sharper and removing the roughness that was created on the horse plate. So this is your progression from finer to finer to finer grit and you again keep that edge right in contact with the plate.
The whole time got a helicopter going over sorry, guys, alright and back there back. There now keep this up until the glides real, smooth, think of skating across a frozen pond, and when you can skate across smooth the silk, then you’re ready to go to the next step. So let’s do that we’ll do a few more here. It’s starting to get real smooth. That means a real sharp and then we go over to the ceramic.
Now it’s labeled on the end here, C F and then there’s a thing looks like a J. That’s actually a fishhook, but we’re going to go to the sea. That’s course- and you can do this or you could just skip over this one, but here’s your shoulder again now that was 20. This is 25 degrees. This sets the actual bevel for the cutting edge and again you’re going to go left and right or you could do sets of 5 left 5 right, but back and forth I kind of like doing it.
This way and you’ll feel it some roughness at first, because you’re taking again that toothiness out that you created on the diamond plate and bringing it right up into the tip right up into the tip you see left and right until it glides real, smooth again like skating across that pond nice and smooth ok, we got that now and then we go and rotate this over to F, which is fine and again we’re going to go left right, and this takes all the rest of the toothiness out of that edge.
Keep it in contact with the ceramic here back and forth until it it’s as sharp as you want it to be. Now. This is the the step define ceramic here that will get the knife sharp. Now it might leave a little bit of a wire edge, it’s called or slight bit of toothiness in the edge, probably not much, but so then you flip it over to this side, and this is a leather strop.
It’s got a little bit of polishing compound in it, and here you go in Reverse the angles not as crucial but stay in touch with that cutting edge so you’re going to bring it up into the edge here up into the edge up into the tip left/right, the going reverse. You don’t want to be slicing into the leather, so this is the opposite direction of what we were doing left and right, and this will put that final razor edge on the knife.
You can actually get a shaving edge with this sharpener on a knife when you’re done so at this point it’s very very sharp trust me, but that’s how you would do a blade like that. Now it’s got some other features by the way: it’ll work on outdoor kitchen, knives or any eye a knife like that folding knives, whatever got a few here. Let’s some take this one.
This one has serrations in it and then we’ve got a bread knife here, a serrated knife as well: okay, well, you’ve got these ceramics and you’ve got a little one up here. You have two different radiuses. A wide radius would be perfect for sharpening up this bread knife. You drop it on there on the serrated side and drop each duration into onto that to rate at ceramic and just go back and forth a little bit on each one and sharpen that knife up this way.
Okay- and that’s proper for for this knife on this, one you’ve got smaller serrations, and so your smaller section up here is perfect for that back and forth on each of these serrations yeah, and that’s how you would go about that. Some serrations are so small that this is even too big for it, but you can get most of them alright! So that’s a serrated knife! This J thing looks like is a fishhook, and so your fish hooks you can hold and run them back and forth in these slots here and get your fishhook sharp.
One of these is little wider than the other. So you’ve got like two sizes of slots for fish hooks, but it’ll do a lot of other things as well. If you watch the video, that’s on the QR code or in the company site or on my website, you’ll see some of the other uses. You could do a shovel and axe actually probably do a lawnmower blade with the coarse one, but lots of things can be sharpened.
Scissors, yes, so checked all that out. There are instructions that come with this I want you to there roll up in this little cute little thing there inside in the secret storage compartment there. It’s got these magnet closures that hold that in place and if you’re doing broadheads, that’s like bow arrow heads. You know you’ve got your wrenches here for your three and four vane broadheads, and so you can disassemble and reassemble them with those are little wrenches and then they are sharpened on the fine diamond plate.
Here you can just take each blade, or sometimes you can’t take the blade off, but you can still sharpen it on this plate. So even for the bow hunters, this is perfect. Now you can get replacement parts new plates, new leather. Whatever you need from work, sharp tools, calm, that’s the company website or I can get them for you. If you want to call me okay, but there you go, it’s an awesome, little Buy and it’s handy to have you want to get one of these for all your friends and they make great Christmas and birthday gifts.
So they’re on my website work, sharp tools, calm, a workshop, easy calm is my website. Thank you. So I appreciate any business. You want to send my way and there you go. Okay, I hope that was helpful and back to the beach here. I’m, not going to jump surfboard today, but it’s a great day for to tell you, take care and stay sharp.
Well, hey everybody Aaron here, welcome to today, I’m excited to show you a brand new sharpening system from work sharp. This is their guided, sharpening system or GSS. That’s what I’ll refer to the rest of the review is the GSS. Now this is what’s really cool. Is you know, from time to time, I participate in, what’s called the gauntlet, it’s about ten different channels with ulcers, dim perspectives and abilities, and we throw pieces of gear to those ten channels and each person reviews it, and so you get to really see it over the long haul.
How an item holds up I recently threw in the gerber strongarm use and abuse that thing through ten different channels, with ten different it and putting it through tasks that I never thought that knife would be able to handle, and it did so that’s been really cool to kind of from time to time. I’m able to participate in that. Well, what’s awesome is that work sharp instead of sending one item and then for ten of us to work on it over time it might get worn out or you know whatever, because of this being a sharpening system.
They decide to send one to each of about these ten channels, myself included, to get a full review so that all ten of us could really get a real good feel for this new sharpening system. So, today, I’m going to be able to show you what this GSS guided sharpening system from work, sharp is able to do for you. I have a couple blades that we’re going to test out I’ve had a chance to resharpen about a dozen blades on this and I got to tell you guys, I think you’re going to really dig what work sharp is producing now with their diamond stones and a guided sharpening system.
So with that being said, let’s go ahead, jump to it. I’ll show you a couple different blades, a couple different things that we’re going to do just show you some basic stuff on it. What I’ve used this for and how I have seen this really do some things that other sharpeners can’t do then we’ll wrap it up with my final thoughts. Alright, so I want to show you and not only the first, the two tools that we’re going to be sharpening.
Today we have the tops, knives, anaconda 7b. This is a very large knife. With a quarter inch thick spine, we got a recurve and we got some chip damage down at the tip that we’re going to show you how this sharpening system take care of and then for the serrated portion. We have here the Leatherman OHT, with a fully serrated blade that we’re going to look at as well, so those are the two items are going to be.
Testing and resharpening. I’ve done quite a lot more than this, but this is just for this video. Now, when you purchase the GSS kit alone, just the GSS kit, that’s going to run you sixty dollars, and this is what you’re getting you’re getting this full ceramic set up that we’re going to look at here. You get two diamond coated stones and these diamond coated stones are an inch and a quarter by six inches.
So that’s the dimensions and the coarseness on them. You’re going to get a fine and a coarse, the fine one is going to be 600 grit and the course is going to be 320 grit. So those are the two different grits on there and then the platform that those magnetized to and then the plate that they rest in, so we’re going to walk through. All of that, but that’s $60.
Now what was also sent to me on top of just the GSS kit is the upgrade kit. So let me show you what the upgrade kit comes with alright, so the upgrade kit is an extra 35 dollars, but as you’re about to see throughout this video I think it’s well worth. The price I would highly recommend picking it up. It’s worth extra thirty-five bucks, because this is what you get you’re going to get a coarse stone that is even coarser than the original that comes with the GSS and that’s going to be 220 grit.
So that’s going to be very coarse, then you have an extra fine stone which is going to be 600 grit, and then you get a leather strop and if you can watching the channel, I’m really digging the leather strop slightly, and that comes with a compound of 0 5 for the compound grit. So a lot a lot of extra features for that extra $35. So for everything that we’re going to be looking at here today, this entire system we’re talking 60 bucks for the GSS system and then we’re talking $35 for the upgrade kit, so I’ll refer to that back and forth.
But basically what you’re looking at is a sharpening system worth about $100 and as you’re about to see I. Think it’s well worth that price point all right. So now that I’ve shown you not only the GSS, but then the upgrade kit and the two differences there. I just want to kind of show you what we’re going to be doing and how you set this up and what the actual GSS system has to offer you.
So the first thing that we’re going to do is we’re going to be working on the anacondas chip so because I got the upgrade I’m going to go with the 220-grit course extra course stone. So this is the platform for the your stones and it has a magnet with two little pegs that just see really nice into place magnetized to your diamond coated stone.
So it’s real nice into place there, and these are just going to rest right here on the platform. Now the platform has a lot to offer you on the bottom. Here it has four kind of plastic rubberized feet that are really going to grip. Your you know, counter tops and tables. Well, the one thing that I wish they would have added were some holes that they could have screwed bolts into if I wanted to in screw it and mount it to like a workbench or something like that.
There’s not that option that would have been nice to have, but these feet do a really good job of gripping really. Well, then, you have these guides and that’s one thing that work sharp is really known for is helping people with guides for those, particularly who are just starting out with sharpening. So what this has are these plastic ramps here at 17 degrees and if you want to rotate them because they are rotatable 20 degrees, they lock into place with a little magnet, see really nice, and so the point of that is that you rest your blade right there on that ramp, and that gives you that 20 degree or 17 degree angle that you need to do your sweep.
So that’s real nice that they offer that and what I really like as well is that you can totally take these off because, as your skills improve, you may not really need these down the line. For those of you just starting out your sharpening skills, it’s a great little feature, but as you go on or you know, you just eyeball it because for me and I’m by no means a sharpening wizard at this point, I’m I’m getting better all the time, but there’s always room for improvement, but I usually don’t use these guides.
But for those of you who feel like you need those guides and back you know your two ago: I definitely needed these and then, as your talent and skill improves, you can remove them completely. You don’t have to use them at all if you so desire. So that’s really nice to have so that’s some of the main features about it. But then this is the last piece of the puzzle and actually before I forget just want to show you as well, these really nice- and this is all heavy duty.
This is very heavy. What weighs a lot nice either steel or aluminum rods here they got allen head. So you we take this all apart. If you needed to to fix something or something wasn’t working correct. So that’s really nice! So now that it’s seated there, that’s all great but there’s an extra feature that this system, the GSS system, offers you that never seen before on a diamond stone, a platform sharpening system like this.
That really adds something special to and really increases the ability to really touch up. Your and and re sharpen your blades okay. So the feature on this that really sets it apart is that it has the ability to rock from side to side about 10 or 15 degrees, and what that does is, as you’re sharpening your knives and right now, I’ll be throwing in footage of having already previously sharpened.
The Anaconda of what that does is really allows the very tip of your blade to connect all the way through, and you have the diamond coated stone, touching the tip of your blade all the way through that belly, which is fantastic and really great and really because there’s always this issue of having to resharpen that last, like quarter inch of your blade right there at the tip particularly knives with a lot of belly, and this offers that with that rocking system, because it just sits there, just rocks back and forth and you’re able to connect and really get out all the little chips and birds and that chip that we had on the hand acondo is at the very last quarter.
Inch of the blade and I was able to use that rocking system to really get that last. Sweeping motion, which is fantastic guys, so I really love that that really sets this apart and really connects that all so that the entire length of your blade is getting contact with those diamonds and reprofiling or reach sharpening or moving out chips. So that’s awesome, but for those of you that either don’t want that or- and you think it might be gimmicky I- don’t think it is I.
Think it’s awesome and I’ve seen it really work well on several of the knives every sharpen, but maybe you don’t like that or you have a tanto blade or something like that. That doesn’t have a belly that you need to worry about, that they offer a locking feature this little bar just slides into place. Now it’s solid and will not rock. So that’s an extra feature that I’ve thought about every single thing.
With this system I really like it a lot they’ve thought through it really well, so it’s locked into place! Now it’s not going to rock from side to side. Then you unlock it and it starts to rock and follow the sweep of your blade. So that is just an awesome feature and I love that aspect of this work, sharp so throughout that whole sharpening process for the anaconda after we used the extra course that came again with the upgrade kit that to 20 coarse grit was fantastic got.
The excuse me got the chip completely out of the edge. So then we wanted to go to ceramics and I want to show you the ceramic rods here in first off. Just the main ceramic portion here is real nicely to give you a fine, you rotate it. They give you a course, and then they give you tracks for fishing hooks. If you need to do that and what’s great, is it just clicks right into place boom and then you’re ready to go and I was able to get a really nice fine edge back on that anaconda after having you know, re-profiled a little bit and completely remove that chip using this in these the ceramic rods, because they give you coarse and fine, will also be great for really heavily recurved blades.
Now this anaconda has a slight recurve: it’s not bad, but it is there, but for those of you that, like coup curries and other blades that just have huge recurves in them, the ceramic rods will really work well with both the coarse and the fine to really do that reprofiling and touching up and taking out chips and burrs that you may need to do with this system.
So that’s fantastic and then, finally, after we did that we went back to the leather strop and the leather strop worked great and that’s what’s awesome again, with the upgrade kit I’m just going to keep referring to that. If you’re going to buy the system the GSS system, you really need to go with the upgrade kit as well, so you want to do both drop the hundred dollars.
You won’t regret it, so the leather strop was fantastic and really got a wicked edge back on this anaconda. Finally, as well just to show you on the other side here, you do have these two different sized ceramic rods, and these are for your serrations and like the Leatherman that we have, you can pick the teeth, because this Leatherman has two different sized teeth and you can pick the right size sharpening about ten times.
Then you go to the ceramic fine rod, the big larger one stroke it back and forth to kind of get that the burr off. Then you go back to the smaller teeth. The smaller rod match them up and you’re able to really get a great edge back on it guys so I got to tell you overall I’m an extremely impressed with this whole set up and after having done about a dozen blades with this system from high carbons to high-quality, stainless steels irie profile dan s35vn.
But this whole system, with the upgrade kit and the ceramic rods and a leather strop, really outdid itself and really has performed fantastically well all right, wrap up time on the GSS from work. Sharp guys I got to tell you after having done about a dozen blades on this thing. It’s basically replaced all my other sharpening systems. I had really has I have the spyderco sharp maker, which is great for maintaining your blades.
It’s got, you know ceramic rods and you can upgrade to the diamond stones if you want to the diamond rods, but again that you’re looking at $75. If you get the diamond rods and that only really maintains blades, you can’t really reprofiling. You can’t really take out damaged chips and things like that with the Spyderco sharp maker, so that kind of eliminates you know that I have some awesome leather straps, that I really love, but again you’re only going to touch up your blade and you’re not going to give you all the features that this has then I have some coarse diamond coated stones that I use as well, so I’ve been kind of having this hodge podge for a while and what’s great about this work sharp.
Is that this GSS, with the upgrade, if you get the upgrade kit, basically takes all of those other systems slams it together and gives it to you in a very compact and very portable and very useful setup, and on top of that, has that rocking again that just really I really dig. It really helps me out a lot getting that last little bit on the tip of the blade, sharpened and taken care of, and I really like that idea.
That was that’s revolutionary to me, because none of my diamond stones do that. You know so I’m constantly having to kind of work on that last little tip portion of it and then for those of you who are just getting into sharpening. You know you got the the little ramps here that can help you guide and if you don’t want those like myself, I can just take those off and just kind of eyeball it and do it by feel so guys.
I really hope that overall, this review has kind of shown you what work sharp is producing with the GSS and really point you in the right direction to a base. One fit all sharpening system, I think a lot. A lot of you are really going to be happy with this purchase and it’s really going to maintain a lot of tools for you. Leatherman x’, fixed blades, pocket, knives, hatchets axes and your kitchenware as well so guys I would recommend this to anybody and it’s definitely my go-to sharpening system.
Now it really is guys I, totally love this thing and totally dig in at work sharp. You did a fantastic job. Giving this to us. I mean Wow, producing this, and thank you for throwing in the gauntlet letting all of us test this out, and you know, I’ll have a link in the description below to the workshop website, where they have a very simple tutorial on how to really use this.
You know I, try to give you a basic example and kind of just show you how the night howl sharpens my knives and how I kind of do it, but they have a very, very, very clear, simple, concise, like five minute tutorial on how to really use this to the best of your ability. So I’ll have a link in the description below and you can also purchase it there as well as Cabela’s is carrying this as well as I’m sure, very soon, Amazon eBay and a lot of the other websites so down the line.
I’m sure all those places will be carrying it and so guys with this at $60, then the upgrade kit for right around a hundred bucks, total highly recommended here. My go-to sharpening system now and I love. It love it love, it love it and it’s replaced of this hodgepodge of sharpening systems that I’ve had up to this point. So I really am glad for that.
Guys, I think you, as always for checking out the channel. Please subscribe comment like share this video and, as always, remember to stay, equip stay prepared. We’ll see you out there.
Ребят сегодня у нас точилки и эта made под названием gedit field; шарпа нет и здесь есть краткая инструкция, чего, она, может, и, и, ради, наглядности, пор, шар, шар, принес, ее, артикул, дабл-ю, эс, джи, эф, с, так, вот, разнятся, они, по, цене в районе, 2000 рублей, но, по, своей, функциональности, абсолютно, идентичные, вот, аккуратно, щас, их, откроем, и, покажем, насколько, это, правильно, понятное, дело, точильный, инструмент, от bench made выглядит более эффектно от бело-синий цвет а все, по, дизайну, компании, есть, два, полотна, с, более, грубой, зернистостью, и, мелкой, это, у, нас, алмазные, полотна, здесь, имеется, керамический, такой, стержень, который, крутится, и, тем, самым, а, меняет, как, близко, показать, вот, так, вот, наверное, который, меняет, свою, поверхность, то, есть, тем, самым, можно, затачивать, крючки, можно, затачивать, отдельно, перейти, вот, отдельная, есть, керамическое, полотно, такое, круглое, также, с, помощью, которого, легко, затачивать, какие-либо, инструменты, здесь, вот, есть, краткая, инструкция, то, есть, это, нож, это, ножницы, это, сирии, тарная, за, это, крючок, вот, но, точилки work, sharp здесь, также, более, расширенный, более расширенной; only иллюстрация крючок топор даже можно и также серрейтор и, прочие, ножи, так, вот, выглядит, они, абсолютно, идентичны, не, понятно, здесь, надпись bench made здесь изображение, 20, градусов это видимо google на одну сторону полотна снимаются держится они немножко на магните, магнит располагается, вот в этой, часть 7 видно, и, аналогично, с, другой, стороны, что, это, такое, выпало, видимо, это, я, этот, элемент, не, вскрывал, поэтому, я, даже, не, знаю, что, такое, ну, никак, какая, инструкция, как, все, это, применять, какие, элементы, подвижные, какие, нет, и, конечно, же, элемент, еще, есть, для, финишной, обработки, это, вот, кожи, чтобы, совсем-совсем, у, вас, нож, резал, что, не, наподобие, волоса, удобной, охвату, эта, часть, крутится, ну, и, убить, мы, все, тоже, самое, так, вот, если, нужен, именно, точильный, инструмент, и, нет, четкой, привязки, компанией, bae, чем, то, есть, всегда, альтернатива, всех, благодарю, здесь, был, полезен, до, свидания,.
Hey there, everyone Aaron here welcome to another episode of Gideon’s tactical. Today, we’re gonna do a demonstration field review on the work sharp field sharpener. You know you can have the sharpest knife in the shed, but eventually it’s gonna dull, and if it dulls out you on you out there in the field, you better have a good sharpener.
That’s gonna, resharpen it easily and quickly, regardless. If you’ve got a high-quality stainless steel like 154cm, you got a pocketknife, a multi-tool or a huge ten inch. You know high carbon steel blade any way you slice it. You’re gonna need a sharpener. That’s gonna get a really good edge back out there in the field on your knife, real quickly without too much difficulty or trouble and I believe that might be what we have here with the work sharp field sharpener.
So let’s get out there I’m going to show you at the ins and outs of this little kit and how it operates and is used on all the things you see before you pocket knives, small, fixed blades, multi tools and big fix plate. So, let’s get out there begin to use the work, sharp field sharpener, alright, so the main sharpening surface on the work sharp field sharpener is a one inch by four inch diamond coated plate.
This is removable, has a little magnet right here. So it’s pretty easy watch out Tommy skew that scoot back it’s easy to remove, so you can just kind of click that off and then there are some notches there to tighten down arrow heads. If you so desire on your shafts of your arrows nice, but there’s the little magnet kind of holds the plate in place.
You can easily clean these off and remove them so you’re not having to get the whole sharpener wet. You know as you’re cleaning these, so they don’t feel fine and on the opposite side, you have a coarse again easily remove that there’s a little storage space there. If you wanted to put some, maybe tinder or a firesteel or something like that, magnetized is back on and they are secure.
They don’t wobble around. They click into place nice and secure, but they’re also very easy to remove. So that’s the main, sharpening instrument, coarse fine. Let me show you how the little guide works and how you use this on your knife, so on either end of the sharpener both on the fine and the coarse plates.
Is this little yellow ramp? That is ground in at 20 degrees? Is the ramp angle on either side is 20 degrees? So what you do is you take your knife? You would place it right here, along the edge of that ramp, just making it nice and flat. You know you don’t have to find a secondary bevel or anything like that.
You just lay it nice and flat, and then you just keep that angle consistent and you drag your knife, then you rotate do it on the other side, just lay it nice and flat up against that guide and drag and I’ll just kind of show T in action here, but that’s how you keep a good, consistent angle at 20 degrees as you’re using your knife.
You just keep it nice and flat the side of the blade up against the guide, and then you just drag and swoop. Just like you would a normal, you know whetstone, but that 20 degree guide guide, just kind of helps you out a little bit as you’re using the sharpener. So there we go I’m just laying it up against that guide.
You just drag your whole blade and keep that consistent angle and you’ll be able to get a really wicked edge. Real quick. This knife didn’t need a ton of resharpening, so I’m, just using the fine stone right now. If it’s pretty bad, you got chips. Then you use your course on the opposite side, just right there, you just flip it over hold it.
Your thumb has a little place to rest right here. I would like to see that a little bit longer you could get some more support, but that’s kind of where you hold it. You put your index finger underneath on that opposite ramp right there hold it in place and sharpen your blade, very easy, real nice, oh yeah, shaving sharp, look at that.
So you can see I just use that little guide and I can even resharpen my SP 51. This thing is nine and a half inches overall quarter, inch thick high carbon steel, and you can see here I’m able to get a good grip and go to town and get that nice edge back on this blade, so I can get back out in the field. You can see that I’m using my index finger to kind of support.
The sharpener down here and I. Just would really would have wished to see that little thumb support a little longer. Maybe give you a little bit better handle, then you might be able to kind of grab the work sharp a little bit better when you’re sharpening. But you can see here, I mean a nine and a half inch knife, no problem to resharpen and get a good edge back on your blade, real quick out in the field now on one side of the work.
Sharp is a real nice ceramic rod here. That has three different options for you. It has a fine, a fish hook, and course sharpener, and it’s very easy to tell which one is which, by this little toggle, which rotates and spins them right here, you can see there that it has f4 fine. You just have that F facing straight up, then you rotate it.
There’s your fish hook. You can you sharpen your fish hooks and then see, for course, if you need the course ceramics, these need to be cleaned a little bit very easy to clean with you know, just some sort of grout cleaner. You know powder grout cleaner for, like a ninety nine cents. At the hardware store it can very easily clean off those ceramic rods, but that’s a huge awesome advantage that this work, sharp field.
Kit sharpener, gives you and let’s go ahead and test them out and see just kind of give you an idea of how you would use these ceramic rods and even with higher grade stainless steels like this 154cm. I’ve been very impressed with the work. Sharps capability is getting a real nice fine edge on higher quality steels.
You know. Sometimes these field sharpeners don’t do a very good job. You know they’re just good for high carbons, but this 154cm will take a wicked edge with the ceramics, as well as with the diamond plates here when you’re, using the work sharp and can work on these higher quality blades and get a good edge back on them.
Real easy. So, as requested I had a few people ask me if I could show the hung list being sharpened on this kit and, as you can see there I’m easily able to get the ceramic rods on this blade and I mean 10 inches guys I mean this is a 10 inch, blade and I’m. Using this thing to resharpen the edge and I can get it back to shaving sharpness almost immediately this high carbon very, very easy to do.
It does have little guides on the side here, but they’re at 25 degrees versus the 20, on the yellow for the diamond. So I don’t really know why they did that. I would like to just keep it consistent, I, don’t to use those guys when I’m doing the ceramics rods. You know I just kind of eyeball it and do that, and you can obviously again just use the diamond very easy to do.
You know: yeah buddy we’re gonna get a whoo shaving edge. Oh my gosh shaving. Those little arm hairs right off very easy to do with the work sharp field sharpener. One other thing that the workshop gives you is the serration sharpener on ceramic another little ceramic rod right here designed for serrations I have my Leatherman wingman.
You know I’m, not a huge fan of serrations, so I’m not usually too worried about this, but this particular multi-tool comes with that and what you’re able to do- and this is designed perfectly not only to match those big teeth, but also the little ones. So you just match it to where you need it and then just kind of rub it up and down back and forth, moving it along the teeth, as so desired, and then you’ll get a really good little edge back on your serrated teeth, with that little design there so great for serrations sharpening as well.
This work, sharp, sharp kit, okay, so on the side of the work, sharp is a leather strop, real nice. This is the last finishing touch you would do. You would run your blade backwards along the strop and this gives gets off all the last little tiny microscopic burrs and really shines up the edge. So it’s got a really nice.
Shaving sharp feel to it. So you just run it back and forth. You know it is leather, so I would recommend putting a little tiny bit of either vegetable oil, olive oil. You know any type of oil just a little little bit on a regular basis, just kind of maintain it keep it nice and oiled up. So doesn’t it begin to crack on you? You know or something like that over a long period of time, but that’s nice, strong, durable last you a long time and you’ll be able to strop your blade and will also help with some convex edges as well.
For those of you with convex blades. You know this will be able to maintain a little bit of that. You know get all the little tiny burrs off. It’s not gonna totally redo your edge. You know once a convex gets adult bite, it will touch it up if need be. So that’s the last finishing touch on the work. Sharp. Is that they’re, strong, okay, everybody so you’ve seen the work sharp field sharpener out there in action, you’ve seen it do all sorts of stuff, for you I think it’s a total home run guys.
So the price point of around 20 to 30 bucks, Amazon, eBay Cabela’s, you know Bass Pro they’re, all gonna have it I mean it just does a plethora of blades and a plethora of blade steels, you know regardless. If you got a serrated, you know multi-tool, you got a nice high-quality, stainless steel like 154cm or you got a huge high carbon like the humblest you’re gonna, be able to get a really nice edge back on it, real quick and it’s a shaving sharp edge.
You know some of these other sharpeners, like the EZ lap right here. This thing is, you know, a little smaller, a little more compact, but it’s just the diamond rod and it’s only really gonna get a working edge back on your blade. You know, it’ll take out the chips and the dings and you know kind of get it some.
You know get it back to sharpness, but it’s not gonna be razor. Sharp. This thing with its ceramic rods will definitely be able to get you a shaving sharp edge back on even your stainless steels, and definitely your high carbons real easily. So at the price point you know this thing’s gonna run about 18 bucks right here.
This one’s gonna run you again like 28, 30 bucks, so ten dollars more, it’s gonna be totally worth a purchase. Small compact, you know, send it to your guys over around the world and the military, great gift for military people. You know bushcraft survival kits you name it. It’s gonna, do amazing job for you and get a good edge on your knife when it dulls, because your knife will ultimately dull, no matter how wonderful your steel is.
The work sharp field- sharpener is an amazing option for field sharpening and I would highly recommend it thanks. So much for watching everybody stay equipped, stay prepared and we’ll see out there.
Welcome back to the workshop, I’m josh uh field, sharpener and so we’re in its proper home out here in the great outdoors. We’re going to be talking about some of the features that make the field sharpener really special, we’ll go over all the components the angle guides. The abrasives then we’ll show how to sharpen a few different types of knives and tools on the field.
Sharpener and finally, I’ll give you a quick overview on the different components and how to maintain them, clean them and make sure you’re getting the best performance from your sharpener. The guided field sharpener starts off with five different abrasives. Of course, 220 grit diamond gives you a great coarse grit for repairs or setting the edge on a really dull knife, flipping it over there’s a 600 grit, medium diamond, which is great for sharpening and touch-ups.
If your knife has seen a little bit of use. Next up is the ceramic rod there’s a coarse and a fine ceramic rod. The course is a corduroy-like surface. It’s an interrupted abrasive with ridges, which allows for more surface contact with the blade you can index the ceramic rod with this red knob and, as I rotate around, I can rotate from coarse all the way to fine, which is a smooth surface for fine honing and polishing the edge in the middle there’s.
A groove specifically for fish hooks slide the fish hook into that groove and run it back and forth a few times to restore a really crisp and sharp tip. There’s another ceramic rod here up top it’s much smaller and it’s really meant for sharpening the inside of serrated knives, specifically those smaller serrations, the large serrations.
You can touch up on the larger ceramic rod here. The leather strap comes with a green compound, already rubbed onto the leather as you break it in you’ll start to develop this black and glossy. Look, that’s how you know it’s really performing well and polishing your edge. Another obvious feature of the guided fuel sharpener is the amber angle guides.
These angle guides are set at 20 degrees on the diamond and actually they’re set at 25 degrees on the ceramic. We do that to create a slight micro bevel and to help you get to the cutting edge faster when you’re touching up your knife or doing that final sharpening. It’s also a 25 degree angle set here on the leather, and you can see it’s a reverse guide.
When I set my knife on the guide, I can then bring it up to the strop and make that reverse stroke to polish the edge one more hidden component or feature of the gfs is the internal broadhead wrench. We’ve got a four and a three blade: broadhead wrench, that you can stick the arrows in there twist the shaft and they come right off, so you don’t have to grab the sharp metal on the other side.
If you open it up, it exposes the compartment and, if you didn’t know, there’s some instructions in there. This is a great user’s guide, pretty condensed version and should tell you everything you need to know if you’re not watching this video store, tinder or extra compound, or maybe a little bit of oil for the strop in here or really whatever you need for wherever you’re taking your guided field sharpener, I almost forgot the guide guided, feel sharpener actually also has a lanyard hole.
You can’t miss that feature all right. Let’s jump in and sharpen a few different types of knives on the field. Sharpener and I’ll show you some of the subtle differences in technique. First, off we’re just going to start with a basic outdoor, bushcraft knife. This knife’s already got a decent edge on it, and so I’m just going to start on the medium diamond.
There’s a couple ways you can hold the guided field. Sharpener there’s this thumb grab here and you can keep your hand completely out of the way of the sharpener or you can keep your all your fingers under the surface that you’re sharpening on, but get a little bit better purchase on the sharpener. You could even rest it down on a table.
A rock or some sort of work, surface I’ll rest, the knife on the 20 degree guide and make a pass along the diamond notice. I stopped with the tip of the knife in the middle of the plate or just without dropping it off the edge. If I run the knife over the edge of the plate, I risk damaging the tip by shaving off some metal I’ll make about three to five passes per side.
Until I begin to raise a burr I’ll check for a burr by pushing my finger away from the edge on the side, I just sharpened and it should catch like a fine wire on the very edge once I’ve raised the bur I’ll switch to the other side and repeat the same number of strokes. This is a little bit larger knife, but if you have a knife any bigger than this, you could make two different strokes and still accomplish the same thing.
The first stroke would sharpen the first portion of the blade and the second would sharpen, through the belly and towards the tip it’s the same process and allows you to have a little more control over your sharpening after I’ve raised the bur on both sides. Then I’ll progress down to the ceramic, you can start on the core ceramic or you can skip straight to the fine ceramic I’ll just start with the fine ceramic again.
The process is the same I’ll rest. The knife on the guide, bring it to the abrasive and make a pass across the stone. When I work on the ceramic I’ll alternate strokes, one stroke per side, this pushes the burr back and forth refining it farther until it disappears completely after I’ve honed on the ceramic I’ll, bring it over to the leather resting the knife on the guide, bringing it up to the leather and making that reverse stroke.
Again, as I work I’ll end up, alternating sides finishing with light pressure and one stroke per side, I’m sharp and ready to go when sharpening knives with a recurve or like a hawk spill style. Blade start on the coarse ceramic rod. The coarse ceramic is a slower way to sharpen, but it does give you access to sharpening the inside portion of that curved blade.
It will raise a burr just be prepared to take a little bit more time. The process is the same rest, the knife on the guide and make the pass across the ceramic, depending on the level of sharpness or dullness of your blade. It may take anywhere from 10 to 20, or maybe even a little bit more strokes per side to raise that burr.
Once you have a bur switch sides and repeat the same number of strokes once you’ve done even strokes per side change to the fine ceramic rod and alternate strokes, just like you’re sharpening any other knife after that move on to the leather strop and finish it up, you may have to get a little creative as you use the leather strop, but don’t be afraid to use the sides of the strop to get in contact with the inside of that curved edge.
Just like that ready to roll the field. Sharpener is also great for sharpening larger tools like hatchets and axes and I’ll show you how I like to do that for some tools. You can bring the blade to the sharpener and work back and forth. Almost like you would a knife I like to use the coarse 220 grit. It removes material quickly and helps you restore the edge.
You can also set the field sharpener down on a rock or a work surface or tailgate that way, you’re getting good leverage to use the sharpener and you’re keeping your hands clear. You can also bring the sharpener to the axe or the hatchet hold it in your hand, keep your fingers behind the plane of the abrasive and work back and forth like a file.
The process is similar to knife sharpening in that you raise a bur and then change to the other side and remove that burr. If you really want to polish the edge, you could probably use the leather strap to shine it up a little bit, but I recommend using something with a little more horsepower. The field sharpener can sharpen serrated knives as well use the large ceramic rod to get inside the large serrations and the small ceramic to get inside of the small serrations.
The process is pretty simple rest, the serration on the ceramic rod and find where it nests in, and you can usually feel the angle ground into the knife- slide it back and forth, maybe half a dozen times, and then you can check to feel for a burr. The burr will be pushed up like a fine wire again just following the inside of that serration work through each serration, independently, the large and the small.
Until you have that burr then go back and remove the bur. To do that, I like to rest the knife nearly flat on the ceramic, but slightly angled. This way, I’m not marring the whole face of the blade make a reverse stroke like you would on leather. Perhaps do this three or four times and then progress down to the leather same process nearly flat and pulling backwards to avoid damaging the leather make sure to pull straight back.
If you cut at an angle, you may damage the leather as well. We get a lot of questions about how to sharpen broadheads on the field sharpener and every broadhead’s different, and they each present their own challenges. The biggest challenge is getting access to those blades or the cutting edges. Once I get my broadhead tightened onto something, I’m going to use the sharpen a little handle or a bit of arrow shaft, then I’ll put the plates back on and I usually start on the fine diamond or skip straight to the fine ceramic.
My goal is to get that blade in contact with the abrasive and I’ll move it against that abrasive, in any way that I can to raise up a bur and to match the existing angle on something like this I’ll work up and down to restore that factory angle. The process is the same I’ll come in and I’ll hone on the ceramic.
You can even polish, with a reverse stroke on the leather, just like a knife and be left with ridiculously sharp broadheads. Let’s talk maintenance, the diamond plates on your field. Sharpener can be cleaned, pretty easy, with a stiff, bristled, brush or soap and water. The diamond on the abrasive is always going to be harder than your knife steel, but with heavy use they do wear down and smooth over requiring a little bit more heavy-handed sharpening.
If you do want to replace your diamond abrasives, you can find those on workshoptools com maintenance for the ceramic is simple as well. You can clean it with soap and water or with a pencil eraser. If you do need to replace the ceramic rod, there’s a pin by the red knob here that you can push out, then the ceramic rod slides out and you can find those replacements on workshoptools com as well.
Last but not least, the leather strop, we do have replacements available for the leather strop, again workshoptools com, but don’t underestimate cleaning out the leather strap if it gets packed with dirt debris or knife steel that you don’t want in there anymore, and you want to reset the strop use, really hot and soapy water to break down the oils inside of the strop and release any of those pieces of debris.
Then, once the leather is dry again apply a very small amount of oil, boot oil, mink, oil, petroleum jelly to the strap and then the compound work that in and like I mentioned earlier as you work it in it should develop into a glossy almost black. Looking finish, that’s when you know it’s really well broken in here’s, a few tips for this on-the-go sharpener when throwing it in a pack flip your abrasives inside out.
They still snap into the frame the same way and it protects anything in your pack that might get scratched be mindful of the magnets on the inside and when you throw this in your pack, try to keep it away from a compass if you’re out in the field, you might be there a while, if you’re out traveling not into the woods, it’s still a good idea to bring the field sharpener.
I don’t know how many vacation rentals I’ve been in where the knives are dull. I actually think every vacation rental has dull knives. This is a super fast and portable way to touch up those knives and it’s tsa friendly last thing. I’ll say about the field sharpener, if you’re looking to gift a sharpener, this is likely the one we’ve heard from so many customers all over the world, that this is how they learned how to sharpen a knife.
So keep that in mind. Maybe this is the one thanks for watching this episode of the workshop. Let us know in the comments: what is the craziest thing: you’ve sharpened with the field sharpener or what’s your favorite feature on the field sharpener, if you’re new to our channel, you can hit the subscribe button right here.
We post new videos every week, all about our sharpeners and sharpening in general or there’s, probably another video you’ll like right here. I’m josh and we’ll see you next time.
Today’s video and we’re going to talk about field sharpening keeping your pocket knives, your hunting knives, your field knives your axes, even things like fishing hooks, keeping that stuff sharp in the field is very important. It’s ice fishing season, so keeping my fillet knives sharp, for example, is important to me this time of year. So at home I use several different things. I have uh, you know like a bench top type guided sharpener. We looked at the work sharp one a couple weeks back that video got a lot of attention.
I also have this kit that uh that I used to take with me out uh into the field, I’d throw it in my uh. You know day hiking kit, I’d, take it camping with me and uh, and this works pretty well, it’s pretty comprehensive. I’ve got some dmt stones in here in four different grits. I’ve got a serrated uh blade, sharpener sharpie. Here I’ve got a little towel in the back here, some loctite, for maybe the your pocket knife, uh screws came a little loose and I’ve got this um lubricant here uh, so that works pretty well.
And then I have just a strap that I used now. I take these out into the field, as I mentioned, but I pretty much lately have just been keeping these in the drawer. This combination here works really well. If I’m sitting at my desk, I can just pick up a knife and keep it really really sharp. But what we’re going to talk about today is the uh work, sharp guided field sharpener. Now I’ve been using this for about a month. Now it’s been out for quite a while.
I just never had I had gotten my hands on one, so I uh you know I. I have a lot of other work sharp products and they do make really good products, and this is one of them. I think this is probably the most comprehensive uh field. Sharpener. You know in something this size that you could take with you uh out in the field. It has uh the ability to do. You know your pocket knives, your your uh hunting, knives fishing, knives, um full-size field knives.
You can even do axes with this, and it has some other little components here to do fish hooks as well. So it really is a pretty comprehensive solution in a lightweight package. This only weighs 4 6 ounces and it you know it’ll slide into any pocket slide into any. You know little zippered compartment or whatever in your in your bag, and it really has every component that my other kits have just all in this one tool making it great. So it’s got a five stage.
Sharpening system you’ve got two diamond plates: you’ve got a fine uh, 600 grit, uh sharpening plate, and then on the other side, you have a coarse, 220, grit diamond plate, so you’re not really going to use the course. Unless you know, you’ve got some, maybe some small little chips or some rolls to take out mainly you’re, just going to touch it up with the fine and for those super seals that don’t don’t dull that quickly. You also have several different components to keep those razor sharp as well.
So you have two ceramic rods: you have a large ceramic rod and then a smaller ceramic rod. Here you know to me: I don’t really get the need for the small ceramic rod there. You know, since you have the large one, but I suppose the small one would be handy to maybe do serrations or to do fish hooks, for example. Now, if you look on the side of the ceramic rod, it’s actually a three-stage ceramic rod, so there’s got you’ve got an f there. That is for fine.
We can go ahead and turn this to the fish hook, setting which has a groove down the middle. So it allows you to you, know, use those fish hooks down the middle of that ceramic rod and then you’ve got a coarser setting here, mainly probably 99 of the time. I just have it on the fine uh. There is guides here. 20 degree. 20 degree guides here for your uh stones. So that’s nice! It helps you achieve. You know that angle, um, that’s on both sides and then uh.
You have, I believe, it’s a 25 degree angle up on the um ceramic rod. You know once you get fairly good at sharpening. You know you pretty much can tell whether you’re hitting the angle or not and then what’s really cool is you have this strap built right into the side here. It’s got green strap compound on there. So really what you get with this tool is a really robust uh. You know really durable product that has all the little sharpening. You know, options that you could use out in the field to keep those those tools, uh, nice and sharp now.
One other thing that I will mention is that these plates are magnetic, so they do pop off uh and on the inside here you not only have a little storage compartment that you could put things in uh, but on the other side you have broadhead uh wrenches, not sure that you’re ever gonna use those. You know, if you have your broadheads on your arrows, you could use this to tighten and loosen those. You know I generally just throw a glove on and and do it that way.
So you know not that big a deal, but it is in the tool. So I thought I’d show it to you. You can see here this one says coarse: it doesn’t really matter which uh which side you put these on. So let me zoom you out and I’ll walk you through how to use this sharpener. Now my bushcraft knife knife is super duper sharp um generally, these are going to be for me, they’re, going to be 3v they’re going to be aebl steel, so they are, you know, going to be fairly durable, fairly resistant to any kind of chips or nicks and they’re going to you know have that pretty good edge retention.
So I don’t really need to ever run this on the fine blade, but you know I can touch it up on the ceramic rod, so you’re simply just going to run this lightly over the ceramic rod, and this again is already really sharp. So I only have to do it a couple times there. You can check your edge here and it’s just razor razor sharp, probably don’t even need this drop, but again you do have the the guides on your strop as well. So you basically just line it up with that uh that guide there and then run it across and then, when you get good, you know you, you know how to do it.
So basically, you just run this across the stropping compound you’re, going the opposite way that you would go when you’re sharpening and again, I’m not applying very much pressure at all, I’m just running lightly on there, and that knife is definitely good to go so the field sharpeners also obviously going to work for your uh folding blades as well. Again. This is a super steel here, so it’s pretty dang sharp! You know when you have these things laying around.
I keep all my knives and tools sharp, so I don’t even really have to run it on either diamond plate. Again, I can just touch this one up with the ceramic ceramic rod just run that back and forth a couple of times, and that’s really probably all it’s going to take again. I could well yeah see. One side is a little bit sharper than the other, sometimes you’re, getting it so sharp that every single time, no matter how much light pressure you put on that you’re actually rolling that bevel over to the other side, and that’s where that strop comes in, because that’ll actually do a little bit less to your blade and that’ll just straighten that blade right out, and it should give you the same: the same amount of uh sharpness on both sides and yep.
That is scary, sharp there, let’s grab a knife that I haven’t touched in quite a while something like this leatherman here now. This is a softer steel. So it’s going to dull uh faster! You know upon use, go ahead and pull this out here, yeah pretty pretty dang dull there. So it’s probably not quite dull enough to use the coarse side here. That’s really what you’re going to use if you had like chips or dings, there’s no real chips or anything in this blade.
So I am going to start on the fine side here and then again, I’m just going to line it up with this guide. Here you can kind of see if I angle that there you’re just laying it right on this guide. Now it is 20 degrees and not all knives are going to be 20 degrees, but it is, does give you a nice starting point there. So I’m just going to start there and I’m just going to do some light strokes all the way across and you can do a certain count. You know I could do like five on one side switch.
It up, do five on the other and then count down from there. So that’s probably what I’ll do so. I got two three four five and then I’ll do five on this side, one two, three four five and every time I’m just laying it and starting on that uh the guide there uh, you wanna check your blade. That’s working pretty! Well, it’s not running up any higher than the actual grind. So then we’ll do four. This way. One two three four do four. This way, one two, three four I’ll do three one, two three three, this way one two three two, this way one two one two, then one one and one and then I’ll check for a burr.
Here I can see that that’s made a nice burr on there. Then we can move over to our ceramic rod again. You can just line it right up with the angle here and I’m just going to hit it probably twice, two or three times we’ll go three and do three two three one two and I’m not applying a lot of pressure at all I’ll just go one, and one and I’ll check it. If one side is sharper than the other which it is, you could sit there and play all day on your ceramic rod, no matter again, no matter how light you do it it’s going to roll over that edge.
So that’s where that strap comes in so then I’m just going to take this and I’m just going to line it up again with the guide here you have guides here. You have guides there and you have guides on your uh ceramic rod as well, so I’m just going to line this up and I’m just going to run it a couple times across my strap so again, we’ll just go lightly on each side here check that for sharpness. Super duper sharp just grabbed a piece of paper. Here we can check out the edge, definitely nice and sharp, so we can even use the sharpener to sharpen our axes here.
This one is fairly sharp, no nicks or chips. So again I can take that uh, the fine uh portion there and for this I’m gonna, do it a little bit differently. I’m not gonna. Try to run it across like that, I’m just going to use it sort of puck style if you’ve ever had a puck. You kind of just go like that um. So that’s kind of what I’m going to do for this. I’m going to hold this just uh parallel to the the table here and take my fine side here and I’ll just kind of go in circles and go evenly across the blade and again, if you had like nicks or anything you could, you could use this coarse side of this.
So basically, what I’m trying to do is get a burr, and I can already feel that there’s a super sharp burr on that. So I’ll flip, my axe around the other way and we’ll hit this side a little bit and already have a burr on the other side and kind of lost it on that side. So I’ll just hit this just a little bit kind of want to even your uh edge out on both sides, so once you’ve hit that with your diamond stone a little bit and gotten it fairly sharp on both sides, there’s really no need to use a ceramic rod or go any further on an axe, at least in my opinion, I’m not looking for a super duper razor sharp brittle edge.
Just as long as the cutting edges is sharp and not dull. Your axe is going to work fine for you, so it is nice that you can touch up uh, even larger tools like axes in the field. So that’s it. The work, sharp, guided field, sharpener lightweight robust and has a bunch of different options for sharpening a bunch of different tools. I like it, it’s going to. You know pretty much become a staple in my pack. Take it when I go camping, for example. I want to know what you guys think make sure you leave me a comment in the comment section below give this video a big thumbs up for me I’ll leave a link below to where you guys can pick one of these up for yourself.
Anything you do purchase off my amazon links does go a long way to help the channel and you don’t pay anymore. So I appreciate that. Please share this video to any friends or family who might be interested and if you haven’t already done so, click that red subscribe button and that notification bell to be notified of new videos.
Piece, pretty user serviceable, pretty easy to pick up food shopping device for under 70 Australian dollars that isn’t evil. How good’s that pretty rare so far on this channel, this is a very good device. I can tell you that from the outset, this is a good one. Folks, this is the workshop filled sharpener. So, unlike this, smaller workshop pocket filled sharpener a lot of people ask that ravine.
Why I’ve been doing this? One and mines been simple this that were that big video I did about a week and a half ago that was about shampoos that are sold as Pocket shoppers. This is just a bit too big and bulky, it’s still very small compacts, but for a pocket sharpener. No, but there was so much interest and some suggestion then I picked one of these up and I’ve used it for a few days and I’ve sharpened several knives on it, and it is great and I see what you’re all saying, excellent, all $64, or so from knife shop.
A you for a relatively complete sharpening kit that, even as a beginner I think this is about where you should start. Don’t start and pull through sharpen just give them for your mum to sharpen it. You know, will sure kitchen knives. That’s what they’re for this is where I think most folks who don’t know how to sharpen it should start. There is guides to help you.
There is good abrasives to do it properly. For you, let’s get into it. I’ll show you how it works up close and will sharpen two different knives. Two different kind of knives and I’ll show you a full sharking with each. You say you get an idea of how it works, so your workshop filled sharpener, it’s this one here. So this is the field sharpener and it’s got lots of things you can do with it.
So, let’s steal a bit of a walk around. So first start when you turn our side, you’ll see that it’s a relatively symmetrical device. That means you can place it down flat on a surface, sits relatively it’s perfectly flat pretty much, and then you can use these two guides here. To start your sharpening angle from simply by resting the knife against there and then you’re still gonna have to have some steady hands.
This is a school you gonna have to let anything, get a free hand shopping so get you angle right and then to your best of your ability, pull knife across right now. One of the things I was wanting to know is how much steady hands at this new. Do you need, and you need a little bit, you do it’s not. You know you can set it perfectly. The guy didn’t be like that.
You know so you have to be steady about it, of course, but it does set for a good first timers or you know, I guess. You know obviously field sharpeners angle, which is 20 degrees. So if you’ve got like a seventeen degree, micro bevel on your knife, putting a 20 degree further bevel on there isn’t going to be a disaster, it’s gonna keep it sharp enough in the field.
Then, when you get home you know you can I raise that again with you 17 degree kit or whatever you doing it. This is an outdoor knife, so you should be running this well, not sure, but I’d run this at about 20 degrees. It’s currently running it’s 17 because of my knife testing about 20 degrees. Is it completely sound angle for a good quality steel outdoor knife? If you’re using a softer steel or a crummiest steel, then maybe 2025 about 20 degrees, absolutely fine for an outdoor knife.
So that’s what these two parts are here. These two yellow pads they’re the guides and they are on both sides. Why is the two sides? You can probably see the slight darker more to glittery sheen there. That means this is a coarser plate, so you can take these off these. They hold it in place with magnets. This is the coarse plate. Take the other one off.
This is the fine plate see so it’s a very sort of all-in-one, well-designed system. You can even keep stuff in here a little compartment, very cool, so you’ve got to you actual sharpening plates. Then, along here you’ve got a ceramic rod or two ceramic rods. Actually that has a setting knob there. So you see, there’s F C and a fish hook. So f is for fine, that’s the one that you’ll be using the most.
So when that’s on so when the F is it’s the top, it’s fine turn it around. Now you’ve got a fish hook groove, so you can put the head of your fish hook and drag it across there. If your fish hooks a dull now, that’s something that I generally don’t have official I would have any alien fishhooks in this house. Bishop doesn’t last much more than a couple of fishing sessions, so that’s redundant for me, but there you go and then just they call the course rod.
So the course rod is slightly corrugated there and I don’t know. I haven’t had any compulsion to use that either the fine ceramic rod, especially after using the fine diamond plate, is enough for me, then there’s a smaller right here, which you could use and all sorts of things like. He could bring the tool to things, use it on arrowheads.
You could use it on bigger knives. You could use it it’s a bit of just a honing, a bit of honing stone there, it’s the same sort of ceramic as this one. Here they say there you go look on the bottom. Here is probably what I think some probably most useful part of the whole thing. I know it’s funny, because it’s not a relatively complex device and you could always just use your belt, but this is great.
A leather strop is something to have in the field with you all the time it’s what’s gonna do most of your sharpening in my opinion, and then lifting up the plate again. You’ll see some interesting shapes there. I don’t know our tree, but apparently those are things for archery to get areas off there you go I. I, won’t talk about anything anything more to do with that, because I don’t know anything more to do with that.
But there you go. It has those archery features as well, so there you go overall, a really well designed tool, but yes, this is definitely where I think you should start, because it’s gonna do some basic teaching of you about how to use an angled system or a freehand angled concept. So, let’s get into it. So first things. First, it’s good this.
These are sort of rubberized for a couple of reasons, so you can hold it and move it about easily and also because it stays relatively still on a desk without having to you know, maybe put a damp towel down, underneath so say with them with stones, sometimes especially with your finest stones. They’re quiet, they slide around quite quite easily.
This has just got enough represent, make it sit pretty happily, so you only really need to hold it with one hand best way to do. It is in your and support hands. Just have it, so you can hold it by this part and I jus may just use the same hands and go push across across. So this is the line still be bushcraft knife and slip. The still it’s quite patchy.
At your best, so part of its shut up, a sharp, still I think right of the heels, still sharp ish, and then it loses a sharpness towards their. They use this very testing. I can go cut, coconut test with it see it needs a new edge entirely. So what we’re gonna do we’re gonna flip it over we’re. Gonna start on this more rough and stone here.
We’re gonna, put a 20 degree bevel back on it and we’ll get this paper slicing again. I promise you so just to the best I can and you know what again it’s a field sharpener, this isn’t a Dowd and kami. This is gonna, do as good as you can do, and you get you really do get better at being steady. You really doing so. You’re gonna go this 20 degree guide.
You’re gonna put the knife on it, so it just feels like it’s nice and nested against there getting sort of lock your arm in a little bit. You know you don’t need to tense up or anything, but just kind of remember this angle. You know, and then you just gonna kind of roll across you know simpler and you’re all across you try and get all the way to the tip in one pass, so otherwise you have to revisit separate ones, so you’re gonna, just pull across all across, do five per side.
This is pretty rough stone, so it should do your cutting quite rapidly so honing again, just it’s just about repeating its. It is an acquired thing. You need to just practice, but you get it alright and again it doesn’t have to be so perfect. You have once in the field if one side is 22 degrees in one side to 18 degrees, whatever it’s still gonna cut for you until we get home, you know see that when I just once, but you know what it’s not the end of the world- yeah good positive feedback.
You can feel this stuff working against the blade and you can see this kind of eventually get a little bit darker as you get some steel powder on that, you find you are pretty good at eyeballing these things like you really do you. You know when you do a wobbly one and, as I said you’re just putting a microbe everyone you’re not trying to do the whole shiny apex there you’re just trying to get that last little bit of edge working again yeah.
So this was quite a dull knife. It needed basically a full restore, so I can definitely feel it’s formed. A ragged I’d say about a 400, grit or so edge now, and it has so that’s much better already and it’s still barely formed there’d be some bearing on there as well. So I wouldnt want to cut too long, because the burr will eventually choose a side, and then crumple and you’ll have a dull spot.
But for that station sharpening that’s good. Switching over to the finer pleat sharpening used to be really imposing to me. I guess: I made peace with the fact that once a knife stole, then you know bad to use what worse kind of really do it. You know and I’m sure yeah. So I can do a lot worse and I have in the past, but that’s usually where not knowingly being overly curious.
Really, as long as you’re doing a basic adherence to an angle as best you can you’re, not gonna wreck the knife, you can always go and pick up some guided system or something or send it off to someone I guess if you really make it a dog’s breakfast of it, but really it gets to a point where you just have to try. You know so this will be making those little grooves the sharpening makes in the edge.
These will be making them much closer together, because really every edge is actually a serrated edge when you think about it, because they are all just little crystal carbides that a sharp nasty, little nasty pointy teeth um, it’s really just them doing a micro serration cutting. So this is making them closer and closer together to the less stress around them, making for a longer-lasting sharp edge when they meet abrasive materials.
That’s plenty of passes, always Saints, who have given me a slightly finer edge once again. So let’s see how that’s looking down already feeling better again when you slide through the paper, even less juddery sort of tarry of sensation huh. So now we move on to the third abrasive, which is this right here and again it’s a 20-degree guide and this one is really just I use this maybe five times per se.
This is just bit of bur management and a little bit planing I find this strop does most of that most of the restaurants. Just like that, you know it’s working because you see a gray line appear and then on the right and then so that’ll really do for that stage. That really is just for me I, always just as tiding. Sometimes it actually has a sometimes just cutting paper going again.
Sometimes I find it actually weakens the edge for a second, it’s actually, okay, but yeah that don’t stop of that this strike. The strop is so important, I think because that often just knocks the burr. The strop, for me with compound I think is what removes the the problematic burr and that’s just me is how I’ve always thought about sharpening that a strop, comp and compounded strop is what really does that breaking off any rocky bits at birth? And this is much less precise, because really it’s soft leather, it’s not really removing material at all.
It removes a tiny bit, of course, everything in rooms a tiny bit but yeah just best of your eyeball as long as they write something absolutely terminating edges going against this you’re. Absolutely fine try be, is you know, even as you can but- and this has workshops compound in it already- it’s got like a green compound that comes with it, but of course, once that seems to be running out, you can just put some olive oil on it.
That’ll, let us the compound. You can wipe it down and then you’ll have a pretty raw strip of leather that you can start again with with a compound of your choice. Right I am pretty happy to say sight unseen, test untested cuz that is going to be a great edge. Now is again complete nice and day two, how I started the knife to the sixty rockwell d2 variant? Still so not the easiest stuff in the world to sharpen, but within my phone is saying ten minutes and 55 seconds.
I’ve done a full sharpening job on this knife to a point where I’d be happy to have this for the rest of a trip, or even just if this was your only sharpening system, a perfectly decent edge that maybe every few weeks shifted. Another 10 minutes on you know pretty darn good, so that was a full sharpening thanks for sticking with it, I thought it might be good to show you everything without any speed.
Ups. What I’ll do now is I’ll show you completely different kind of knife, a kitchen knife with a much longer blade sharpened on the same system. This is my Falcon, even k2, kitchen knife. It’s absolutely wrecked! This package knives get abuse; they do they get put in the dishwasher. They get. You know you think cut whatever they need to cut to say this needs a massive edge restore so we’re gonna, see if I can do a little bit.
Only the guided food shop or no talk about how easy or hard or impossible was afterwards. Let’s see how again it completely ruined and I’m talking slightly rusted out nuts damaged – gliding through paper once again use this little filled sharpener. So this isn’t even a proper home sharpening system very, very capable, really really recommended so far.
This is something that I would really recommend to anyone. Even if you are, you know, a proper stone sharpener like you’re, one of those guys and there’s a few of a few great ones in Instagram I, finally make the pre and trip will be Michael Christie. Even you guys, I reckon if you go out and about unless you’re bringing unless you bring a little stone with you and you absolutely love it.
This is just great for I, can’t think of anyone who would hate this. Who would dislike this openly because it not only teaches sharpening techniques the fundamentals it guides you as best, as you know, it can without doing it. For you- and you know, often, those sort of systems have their own problems ones to do them for you, because they’re often mechanized and often a bit too aggressive or they’re pull through or whatever.
So it’s about the perfect entry point, I believe really positive, review very much a key tool and it’s a great sort of backpacking tool. It’s not the heaviest! It’s not so the lightest thing in the world. It’s got some weight to it, but it’s that weight. That kind of feels like it’s quality. More than anything, it’s much much more fully formed than the pocket sharpener, which I’ll show you next for I.
Guess right now on the screen, it’s got so much more to it that it really is a great deal, especially for about $70, ish and you’re. Looking the next to step up you’re going to start getting your lower end sharpeners, which is probably there’s a larger workshop version of this, with sort of a rotatable stone, it’s about 110 dollars or so and they’re also doing a Spyderco ish system now as well, and then, of course, you do have things like a sharp maker and then above that sort of you’ve got your camis.
You’ve got your wicked edges, your things that are usually going to be about $300 and quite fussy, but a great entry point into the market. Great sharpening tool really recommend that not evil at all so good job workshop. This is the stuff that the world needs more of.
À j’étais à l’étranger pendant jours pendant les fêtes de noël et de fin d’année et puis, je me suis rendu compte que j’avais pas de solution. Vraiment intéressante pour affûter mes couteaux surtout en déplacement j’avais amené une pierre j’avais, amené, ma fault niven des c4, qui est très bien en dépannage mais qui n’est pas vraiment la solution, intéressante quand on a plusieurs types de l’ama futé et je me suis mis, à la recherche d’un objet qui pouvait me permettre de faire, tout ça avec un encombrement assez réduit et j’ai trouvé ce si le gars il à être field schartner de work; sharp, c’est un petit appareil que j’avais repéré depuis un certain temps en fait en réalité, je le pensais beaucoup plus gros que ça est-ce qu’on est qu’il était énorme, c’est pour ça que j’avais pas commander.
Je me dis, ouest dans un sac ça que ça va prendre de la place et puis finalement toutes les fonctions qu’il avait même atteint assez bien et j’ai voulu essayer, je les commande et surtout qu’en ce moment, sur certains sites il n’est pas très cher donc j’en ai profité pour le commander et puis. Je viens de le recevoir et on va pouvoir le découvrir ensemble alors comme vous pouvez voir ce petit, appareil est vendu sous blister ce type, d’emballage que je déteste parce que: c’est très chiant, c’est toujours super chiant à déballer alors qu’est ce qui met, alors, c’est un appareil qui est censé donc affûtez vos couteaux de poche vos couteaux de chasse les lames avec ses rations les ciseaux les haches et outils et les hameçons ça tombe bien, je suis père pêcheur mais, je pourrais le devenir un jour quand, je serai à la retraite peut-être j’utilise pas trop 2h non plus donc mais ça pourrait, se faire aussi par contre les ciseaux et moi, j’utilise beaucoup donc on va se le débat les ensembles j’ai pas vous faire assister au découpage du blister parce que je vais me prendre la tête, je le sais et puis, je préfère faire les choses calmement soigneusement sans m’énerver donc, à tout de suite en fait.
Ça va être très, simple à déballer ça souffle tout seul, je pensais vraiment me prendre la tête puis pas du tout donc voilà comment: est composé ce petit, appareil comme vous pouvez voir, il vraiment pas grand alors, c’est très, trompeur sur les vidéos, c’est souvent le cas d’ailleurs pour les couteaux et autres et autre chose, c’est que on est toujours très surpris quand on reçoit un couteau qu’on, a commandé de s’apercevoir qu’ils finalement, il est beaucoup plus petit que prévu, c’est l’effet de grossissement des vidéos ça donne toujours on a toujours l’impression que, c’est beaucoup, plus gros et en fait ce truc là moi, je pensais qu’il faisait, je pensais qu’il faisait au moins, 30 cm de long quand, je le voyais sur les vidéos et puis en fait il fait à peine il fait à peine 17 cm un petit peu plus de 17 cm c’est vraiment pas beaucoup voyez par rapport à ma main c’est vraiment minuscule.
Bon on va découvrir ce petit, appareil ensemble alors, je sais qu’il est composée de plusieurs partis, c’est ça, qui m’intéresse est justement et il a une face: diamant gros grain d’un côté une phase, diamant grains fins de l’autre toutes les deux guides et comme vous pouvez le voir guidée à 20 degrés; c’est un peu, c’est l’angle, c’est l’angle, d’affûtage qu’on retrouve le plus le plus couramment sur les sur les lames américaine il a une barre; céramique fine sur le côté une petite barre céramique.
Pour laisser rations. Pour les dents de lait dans de l’âme et il a une partie strop son côté, je trouve, c’est ça qui m’intéressait beaucoup alors d’après ce qu’ils, mettent sur l’emballage y met le guide est à l’intérieur; ok à l’intérieur où ça adacore alors j’aurai pas tout péter voilà, a pas mal vous avez l’âme la partie, qui est qui et diamanté qui est aimanté aimanté diamanté est monté ce projet, magna switch mapess michael bay; ok, bon j’ai pas de pacemakers, donc j’ai pas de souci à ce niveau-là, il m’a tout mais toujours des consignes de sécurité des américains sont très très très peureux à ce niveau là où ou des fois, tu es mon pacemaker, s’emballe en affûtant couteau à ce serait ça alors le mode d’emploi, c’est plutôt pas mal foutu, c’est pas une paille à coke non c’est plus grand ça va pas non je faisais moi, je couperai ça au montage, ou pas alors oui on voit voyez on voit rien, impression de déplier, un parchemin secret forcément, c’est en anglais et qu’est ce qui met les ché oui, bon ça on le savait la donc l’angle du couteau, ouais bah il explique clairement comment: affûté donc voilà, c’est pas, c’est pas très compliqué la majorité, d’entre vous et d’entre, nous savent comme, un minimum un minimum est affûté une lame.
On sait comment: ça, c’est comment on doit faire: surtout: un ouais, bon bah, c’est bien ce que, je disais; ah, bon il ya une partie 25 degrés est la partie, 25 degrés, adacore, un oui d’accord; ok, bonbons bron et de l’autre, côté on a quoi elle nous explique les différents partis de l’appareil, bon alors a priori genre mais ça en place ça tient bien et l’autre, il s’en, va aussi et oui ça, va aussi à marquer quoi derrière avait d’accord ce type, servic, corse, grippe; fine, fine, cause brit brit, brit fish, hoek d’accord, rite aid to shop, le wan, chai dimon nature en céramique la batterie swap strap leader; ok, ok, ok, ça, a l’air plutôt pas mal, bon iowa un peu donc, je vais vous montrer ça sur une sur un couteau corse que j’ai depuis longtemps que j’ai utilisé pas mal pour le sauciflard; c’est un acier de merde; c’est du cdu 440 440, tout simple: c’est genre de truc qui se déshabillent facilement ces genres de couteau on voit autorise, stsa, je pense alors, un filetage envoyé un guide ici on pose la lame on pose là où, comme, ça, sur le guide, ça vous donne l’angle d’affûtage et puis vous faites et vous couper les doigts voilà est en fait la même chose dans l’autre sens en conservant l’angle, c’est faconde on me pose souvent la question: savoir quel type de quel angle; choisir pour l’affichage, d’un, couteau, etc, etc.
Et moi, je réponds souvent à 25° pourquoi parce que: c’est oui, c’est souvent, c’est souvent, l’angle utiliser un peu partout mais essayez de deviner comme ça sur une pierre dans une pierre plate, ou une pierre japonaise, qui avait le lendemain 25 de veille beaucoup qui savent pas mais avec ce système, guidé, c’est plutôt pas qu’on, a on le voit bien d’ailleurs comme ton, regarde de profil on voit bien l’angle violent que, ça donne vous avez une meilleure idée comme ceci donc du coup et; c’est sa part, plutôt parce que l’autre a l’air de très très avoisine celle ci à l’est un peu moins voilà voilà ensuite la partie céramique alors à partie céramique comporte trois positions.
Une position pour les hameçons une position: un petit peu plus si je tourne si jamais le sait ici on est sur la partie, hameçon comme vous pouvez constater, je sais pas si vous le verrez bien sa forme; double rainures ici sur, la pierre qui, permettra de passer, l’hameçon comme ceci ensuite en faisant pivoter la petite, bague, je passe à la partie; ça; c’est la partie, assez forte, je crois de la pierre céramique donc là, c’est pareil, j’ai, toujours, mes deux guides d’angle de chaque côté on y voit bien donc toujours en respectant le guide, voilà ça me ravit, c’est ce que, j’utiliserai le plus, c’est plutôt pas mal parce que il suffit juste de garder l’angle qui fournit par le guide; voilà ça, a l’air d’être, plutôt sympa et ensuite ensuite on passe à la partie; fine parties, fines, se, dit ici voilà, et là, j’ai, plus de striures, sur la pierre est, toujours en respectant langues et s’en sort, vraiment, ses, filles, plutôt, pratique est pratique et efficace et ensuite, je passe sur la partie, strop alors, reparti, trope, c’est pareil, la haye, les guider, il suffit de respecter, la loi, alors, là par contre le l’angle est de 25 degrés vous voyez pas si vous voyez comme ça donc la partie strop vous partez comme ça et puis voilà que vous faites la même chose de l’autre côté, c’est pas mal plutôt pas mal hélas en quoi ça va me: super efficace un super efficace vous montre sa petite secte, c’est bien quand même en fait ce couteau couper pas du tout, un aller ça très très bien ça, ça, c’est une bonne solution; si j’avais eu ça si j’avais eu ça quand j’étais dans le désert sa mort a bien rendu service parce que moi j’avais j’avais que ça si la sortir j’avais que la faute niven l’avers que j’ai nettoyé qui est très bien très bien mais, bon deux solutions; d’affûtage, c’est pas toujours idéales surtout en fonction de certains de l’homme par exemple les lames de victorinox qui sont assez qui s’affûte qui demande quand même une pierre très, douce non franchement; c’est du; bon, c’est du bon matos qu’est ce que, ça va donner par exemple, sur les magnifiques centrage de lame du couteau au corps par complètement; droite, c’est très orienté à droite je dirais alors ensuite on a quoi on va faire le test sur mon bep k2 qui, a une fâcheuse tendance à se désinfecter mais ça: c’est un problème connu, c’est ce lieu sur les baies cadeau avec cette plaie avec cet étui en effet rennes, c’est que on lui a reçu souvent reproché de désaffecter d affûter les lames afin de rentrer et de sortir, le couteau sur lui si un jour vous avez envie de vous offrir avec à 2 j’ai fait une vidéo d’ailleurs; c’est une bulle mais toute première vidéo j’avais, faits qui remontent à après très très loin où justement, je faisais une démonstration de désavantages du bk; 2, c’est à dire en le sortant en sortant et rentrant plusieurs codes, son étui et qui compteraient, plus du tout, après quand, je leur passer un coup à la pierre et ensuite, je les remettais plusieurs fois, il y aurait sorti plusieurs fois sans les tuyaux père coupait plus et donc hélas et coupes enfin, il coupera quand même du bois, il vous rendra quand, même, servis dans la nature.
Mais ce qu’il ya: c’est qu’ils coupent pas comme nous on a l’habitude des mais; c’est à dire on aime bien comme ça ainsi quand, un groupe encore, ah oui coupe, encore et coupe, encore, mêlée par hasard par hasard du tout, avoir du tout et ben on va essayer de le rendre à voir avec ce petit, appareil voyez la taille, t’as kiffé par rapport à une lame de bk de donc on va commencer j’ai peut-être pas passé, sur le grand le plus fort je vais passer, directement j’ai, passé, directement, sur la toile à la partie; fine donc, allons-y, c’est parti faut mettre, ses doigts à l’abri en prenant par là et ensuite en respectant le mieux, c’est de s’appuyer en respectant l’angle, je découvre en même temps, vous, donc ça me paraît, un peu ça me paraît, un peu, agressif ça, enlève trop de matière, j’ai, passé, sur la céramique, direct donc céramique on va passer, sur, la partie, moyenne voilà, hélas la céramique, toujours en respectant l’angle au petit, temps, d’adaptation, om, je dis, rien mais dans l’ensemble.
Je trouve que ouais ouais ça commence à bien accroché de loi est bien accroché longue petit coup à la pierre fine, c’est pratique d’avoir à tout en a quand même fait un tour; fine, f, comme, fine voilà si on respecte angles: moi, je le fais vraiment pour vous montrer parce que avec l’habitude on n’a plus besoin, je connais, je le sens en fait ça se sent tout de suite quand on passe le couteau sur la pierre on sait, tout de suite si on est si on est dans le bon angle: du fil, nous sommes un coin pas mal et un petit coup de strophes, c’est bien, d’avoir mis un angle aussi pour pour lost rope, l’assistance, surtout, sur cette, partie là parce que cette partie là qui se déshabillent le plus, c’est ce qui, c’est ce qui, vient frotter contre dans l’étui et là on en est ou à un instant de vérité et ouais et voyez carrément bien ça rase sa race, la mer race, sa mère et 20 pour une grosse l’homme une grosse lame de 6 mm d’épaisseur franchement laid c’est très, concluant l’essai est très concluant qu est-ce qui, a d’autres comme astuce sur cet, appareil, lorsqu’il concerne les la petite céramique pour laisser ration en bon: c’est pas la peine de vous expliquer comment: ça fonctionne j’ai pas de couteau avec avec des la macération que je peux pas vous montrer bien en principe, il suffit simplement imaginer que j’ai des racines des ces rations sur cette partie de l’âme, il suffit de voile à faire comme ça faire comme ça alors de rentrer la petite, pierre dans chaque dans chaque dent et puis voilà faire un petit avantage et il ya; toujours il ya toujours un guide, ça qui est; drôle, c’est qu’ils, ont quand, même prévu un guide même pour cette minuscule de pierre; pour laisser ration.
Bon avant de conclure sur 7 ce petit, appareil franchement, je trouve que c’est super pratique de toute façon avec workshop on a l’habitude c’est quand même des spécialistes, il faut tout un tas de tout un tas de système d’affûtage un peu dans cet esprit; là, je vais, je ferai une petite revue rapide, sur ce petit, modèle là de poche super pratique, ou est assez vrai ça s’est vraiment bien et voilà donc avant de conclure, je voulais simplement dire que je suis assez à tester son terrain mais, je trouve que c’est pratique d’avoir quatre systèmes d’affûtage en 1 c’est-à-dire diamant gros épais diamant fin céramique céramique épaisse céramique fine système pour les âmes son système, pour laisser rations et le str hop voilà vous avez carrément tout en un rsa, je trouve ça génial tout ça pour un truc qui tient dans le creux de la main alors il ya une autre astuce j’ai pas très très bien compris or vous m’expliquiez si vous en avez l’occasion qu’est ce qui met la cgrae à l’arrière quoi ça.
C’est comment: utiliser la céramique, il ya une astuce là ils sont mises en miroir oui ça, c’est l’avertissement pour le pacemaker; ok on peut utiliser ces espaces là pour pourquoi pour utiliser des outils alors là faudra m’expliquer de quelle façon, c’est pas précisé, c’est pas précisé dans la notice der garde et le précise pas, il ya marqué brunch inside a priori semblerait que ce soit fait pour pouvoir verrouiller ou déverrouiller différents différents robinet d’urgence pour le gaz aux etats-unis, utilisent beaucoup de gaz, donc ils ont tous souvent des ce genre de clés sur eux pour pouvoir fermer ou débrouiller le gaz l’eau des armoires électriques tout ce qui concerne d’urgence, je trouve ça plutôt pas mal d’avoir ça, sur soi, comme, ça directement en tout cas ça tient super mais, un élément bien sûr est que ça risque pas de se, barrer ça tient très très bien non: c’est vraiment du sérieux; c’est du solide, ça, c’est le petit appareil que j’aurais bien aimé avoir dans mon sac au passage, je vous montre comment: j’ai remplacé le la sangle souple de demont bk 2 par un système des cloques en l’adaptant un tout petit peu parce qu’il faut quand même agrandir un petit peu les trous du support du support du bk 2 mais, c’est moi, je trouve ça plutôt pas mal, je vous montre vite fait pourquoi déjà le port beaucoup, plus beaucoup plus pratique on a le couteau plus haut sur la ceinture et puis surtout on y adaptant, un élastique ce qu’on, peut faire, je peux si je désire embarqué avec moi, un petit kit, feu j’aurais bonnes astuces, à la gent, embarqué son, petit, feu, etc.
Soient tranquilles, comme ça, ça, vous, permet, d’avoir, un petit système un petit coup de feu et étanches comme vous pouvez voir la bouge pas, c’est exactement le niveau que la ceinture ça se sentira pas du tout moi, c’est juste une astuce en passant voilà les conclusions, ce petit appareil, je trouve ça plutôt pas mal, je pense que je vais pas mal m’en servir le str, hop; c’est du vrai cuir, il y à déjà delà de la cire dessus de la pâte à polir mais ça tombe bien: c’est là, c’est la même type de pâte que j’utilise de la pâte verte donc, jean remettrait quand, il en faudra franchement.
Je vous dis pas le prix mais, bon si vous cherchez un peu où vous verrez que en ce moment il n’est pas très cher sur certains sites, donc voilà, je pense que c’est une bonne affaire, c’est très, pratique, je serai j’aurais bien aimé de l’avoir avec moi, quand j’étais parti en voyage, il m’aurait certainement rendu bien plus de services et que l’adc quatre des six cas témoin là, c’est pas une solution pour tous types de l’âme, un peu court; c’est, un peu petit ça par contre vois franchement, je suis assez satisfait de ce truc pour l’instant un, je vous dirai ça, je m’en retourne en quelques mois et puis on verra allez salut à tous et puis n’oubliez pas rester affûté surtout affûté bien parce que si vous voulez rester affûté affûté, donnez, moi, vos impressions, sur ce titre, ce petit, appareil dites moi, ce que vous en pensez et puis ceux qui ont compris comment: fonctionnent elles et les découpes qui à l’intérieur expliquez moi parce que je n’ai pas très bien compris moi j’ai besoin d’eux j’ai besoin de même ça, je suis, je pense que ça va servir à quelque chose.
C’est espèce de trou là ici là, une forme particulière ou pas j’en sais rien mais connaissant workshop ils ont, tout le temps tout un tas d’astuces vous verrez ce petit, ce petit, appareil là; il est il est bourré d’astuces aussi, allé, saluer tous, à bientôt.
Подписчиков у меня на канале нет вообще поэтому, здрасте, всем, пришедшим, мой, маленький, дилетантский, обзор, на, точилку, combat knife sharp enter at work; sharp или, название, придумали в качестве, предыстории настоящая, хорошая, взрослая, точилка, по, типу, апекс, про, у, меня, есть в 3, реинкарнации для, себя, делал, любимого, но, столкнулся, с, такой, проблемой, для, того, чтобы, поточить, грамотно, нормально, хорошо, нож, нужен, час, вполне, себе, час, разложиться, потом, медиа, темно, его, поточить, а, чтобы, наточить, кухню в которой, там, штук, 5-6, ножей, ну, необходимо, соответственно, раздо, больше, времени, поэтому, задумывался, о, чем-нибудь, механическом, ну, и, вот, наконец, то, нашел, и, так, распаковки, как, таковой, не, будет, потому, что, я, ее, уже, пользовался, но, посмотреть, вот, внешний, вид, желающие, обратите, внимание, вот, размер, ленты, 3, на, лаве, фокус в общем, поверьте, на, слово, 13, миллиметров, на, двести, пятьдесят, четыре, миллиметра, это, его, размер, лент, и, так, распаковочка, маленькая в комплекте, производитель, от, щедрот, дал, аж, целых, два, ножа, сразу, господина, же, сразу, две, ленты, предупреждаю, от, более, взрослых work, sharp эндер, они, не, подходят, у, них, там, какой-то, свой, другой, размер, здесь, именно, 13, на, двести, пятьдесят, четыре, миллиметра, сама, точилка, это, кот, точилка, и, блок, питания, не, знаю, видно, не видно ну на нем написано вроде, как, 12, вольт, блок, питания в розетку, вот так вот, выглядит, это, чудо, враждебно, нам, инженерии, если, поднять, то, здесь, у, нас, три, ролика, вот, этот, ведущий, этот, ведущий, один, из, них, прижимной, ну, и, на, это, ставится, лента, 1, лента, я, уже, пользовался, пытался, точить, кухонные, ножи, ставится, без, проблем, прижимается, закрывается, если, производитель, нам, не, врет, у, и, склероз, мой, не, врет, то, есть, гис, зернистость, 120, grit, как-то, многовато, как, я, уже, говорил, что-то, серьезное, этой, чудо, и, инженерия, точить, не, собираюсь, а, для, кухни, самое, оно, но, все-таки, 120, grit, многовато, поэтому, используя, размер, на, коробочке, без, особых, проблем, заказал, ремешки, сегодня, не, ко, мне, наконец-то, доехали, опять-таки, фокус, не, хочет, ловиться, 13, на, двести, пятьдесят, четыре, миллиметра, зернистость, 500, вру, 600, хлоп, цистерна, палитру, был, и, сейчас, я, их, поставлю, и, попробуй, я, уже, пробовал, ногу, наточу, 1, кухонный, ножичек, родную, заводскую, 120, ленту, я, сбиваю, многовато, у, нас, неплохо, вбирает metal, беру, нож, [аплодисменты], и, таких, вроде, как, и, все, мои, мой, любимый, тест, на, бумагу, не, хочет, зараза, или, нужно, как, или, хочет, вроде, что-то, реже, не, бритва, конечно, доводить, не, буду, но, для, кухонного, более чем забыл сказать на корпусе есть, мусор, я, им, собственно, попытался, пользоваться, но, не, понял, как, мне, и, принципе, так, достаточно, вот, собственно, все, если, есть, вопросы, пишите, вот, такое, вот, изделие, скажем, так, покупкой, я, доволен, кухонные, ножи, точит, прекрасно, всем, удачи, мира, и, добра,.
All right guys today we’re going to be testing the work sharp knife sharpener. This knife sharpener, is supposed to be like a just a beginner sharpener for people that don’t really have the knowledge or the time to sharpen a knife like with you, know, different great, like different grits of wet stones and like sharpen it like traditional way. This is supposed to be just like a quick and dirty way to bring a knife from completely dull back to razor sharp, and it’s supposed to be very little skill involved supposed to be just cut and dry super easy to use, so we’re going to test if it lives up to that.
But in order to do that, we’re going to have to we need some knives that are dull. I have two different knives. The first knife is going to be the carving knife from the miracle blade kitchen knives that I tested I’m using this one, because it is a serrated blade and on the back of this knife sharpener, it says that it, it says pocket hunting serrated in kitchen, but basically all that means is that it it’s claiming that you can sharpen a a regular blade or a serrated blade.
So we’re going to test to see, if that’s true, so we have the carving knife for our regular blade. I have this fixed blade knife that’s made by mora. It says more knife, I’ve just always known these as mora’s they’re, just basically cheap uh like cheap, like a hunting style or camping style knife that are extremely sharp and it’s, I believe it’s stainless steel yeah.
It’s stainless steel. It’s made in sweden for the price of these knives. These are like you can’t you really can’t find knives better than these, especially because I think this knife is only like 12. Maybe so it’s a really good deal so both of these blades we are going to be basically destroying both of these blades and seeing if this knife sharpener can bring them back to the original sharpness.
So, let’s open this thing up see what’s inside there shouldn’t be a whole lot, yeah, not a whole lot. The knife sharpener itself, which pretty small knife sharpener and an extra belt. So this knife sharpener, is really what this is is. This is just like it’s pretty much just a glorified belt sander with a guard. If you look, I think yeah here here you can see it.
You can see the pulleys and everything you can see. This is just like, I said, a glorified belt sander with a guard that snaps on so even though it is really just a glorified belt sander. It’s very simple- and I like that about it, because why over engineer something when something that is very simple works, it’s really not going to be complicated either to because it’s where it’s just a belt.
Once this belt wears out, it’s not going to be complicated at all to change. It just push this down. Take your old belt out, put your new belt on. I really like that. So I really like that, because there’s no maintenance and whatever the belt goes bad. It literally just took me three seconds to change that and a pack of these belts, you can get three of these belts.
I think, for I think it’s like seven dollars for three belts, and I would imagine each belt is gonna. Do a lot right. There is already a huge upside to the sharpener and then, along with the belt, which is gonna, do like the which is gonna, do all the like actual sharpening on the side. You have this ceramic rod to do the the honing. If you want to hone your knife, you don’t it doesn’t really matter the belt should make it sharp enough that it shouldn’t really matter, but that is always an option to hone your knife.
So so far this looks really good. Let’s make these knives really dull and see how this thing works all right. So, first things first before we make our knives dull, we need to see how sharp they are. So we have like a control to go off of once we resharpen the knives this morris since it’s a flat or just a regular edge, I’m going to assume yeah it’s it’s shaping sharp it’ll, take the hair off of you, so I don’t think I can do that with the serrated one.
Actually I can so we’re gonna go with the old paper test. First, up with the mora, I mean you see how sharp that is. Let’s see if this one, I don’t know if this might even do it. Oh, if you catch it in a groove, it will absolutely actually, if you just drag it across it, does the paper test pretty good. So that’s actually extremely impressive I’ve. Never, I don’t think I’ve ever done to do that with a serrated knife.
So once we get these knives dull and then sharp again, I’m going to expect those same similar results with the with the paper. So next just for fun, let’s go ahead. Let’s see if we can slice a water bottle in half. I have absolutely no idea if this is going to work or if this is even feasible but we’ll see. I think first thing I’m going to do I’m going to try with the mora first all right now this one’s going to be kind of tricky, because the water bottle is almost the same width as the as the knife, so I’m going to and I’m not a very experienced water bottle, slicer, so I’ll be kind of impressed.
If I can do this it should it should work. No problem, though, that worked flawless, it didn’t even didn’t even hardly move. I’m gonna expect those same results now. Surely this serrated knife should be able to do the same thing, and I can’t miss because the blade is so big, oh that one that might have even done it better nice that lid didn’t even fall off that just turned and sat right there as you would expect these things are extremely sharp.
Next, we are just going to do just a couple slices with some cardboard you can see. The mora has no problem with cardboard and carbon knife. I actually had a little bit more resistance than what I thought: it’s not as good of a slicer outside, as I would have thought I’ll be able to judge against that once we sharpen it see if it’s more or less whatever, then last but not least, we’re gonna do the tomato test that I still don’t understand.
For whatever reason, the tomato cut test is like the holy grail of whether or not a knife is sharp, we’ll go with the mora. First just cut this thing right down the middle and see if we can get a really thin slice out of this wow. This is actually. This is going to be difficult with this non-serrated knife. Oh, I mean that’s pretty thin, but that’s not that’s not what we’re looking for.
Oh, that’s, a thin one, wasn’t a hole. Slice, that’s definitely thin! You can see. You definitely see the blade through that. So that’s thin! Oh yeah! You can see the blade through that that one does pretty good. It’s a little more challenging you kind of have to like saw through it, because I don’t know, I don’t know the science behind it. Just a regular knife blade just isn’t really good for getting thin slices of tomato.
So now we’ll go to the carving knife, which I’m sure will be fine very thin. Just not not very big. Oh that’s pretty full I mean that’s. You can see the blade through that, so that is extremely thin. My cutting skills are just not very good. Oh that’s the one that one is just absolutely paper thin. You can see the blade through that and everything alright.
So I think that proves that these knives are sharp. So now we’re at the point in the video where it’s time to make these knives dull and I’m sure you’re- probably wondering how are you gonna make these knives dull, and to that I have an answer. Cinder block. I was gonna. Do like a few different things like I was gonna cut, some wood cut a bunch of cardboard.
Do this and that and then I was going to use a cinder block. Then I thought why not just jump to a cinder block damage these things as much as possible, make it not damage them as much as possible and make them as dull as possible to where they just won’t cut, or they would just barely even cut hot butter and then and then we can test the knife sharpener.
So for this next part, if you are a knife enthusiast, I would just close your eyes and cover your ears, because this is this is going to get messy. My goal for this is not to like, like I don’t want to damage the blade really bad. I don’t want to put like a bunch of chips and stuff in it, because obviously, the knife sharpener can’t replace, can’t fix a chip and a blade I just want to just really really round over the edge.
So that way, it’s extremely dull, but still yet it can be repaired, something that would simulate a lot of cutting. I don’t want to just like start to hit the cinder block and just chip out the entire blade, because then that would defeat the entire test. Oh, I think that might be enough. That’s probably like 20 years of damage in 20 seconds. Let’s see if it can even cut a piece of paper, it could rip a piece of paper.
That’s actually. Why is that actually not half bad? We got to do some more because it’s actually not doing half bad about a piece of cardboard, it’ll rip a piece of cardboard. I still think it’s a little bit too sharp, so we better go again. That has to be the end really. It still has like some little like spot. That’s still sharp! That’s too sharp. We need dull.
We need really dogs there. We go okay. I call that officially dull, let’s see, if we can even we can rip the cardboard. We can’t cut it whenever I feel the edge. It honestly doesn’t feel much different than if I was to just fill the back now for the serrated knife, this one’s probably going to get really ugly. Is that cutting into the concrete? Is this a kitchen knife, or is this a conker? Or is this a cinder block knife? Oh, I don’t know how well you can see it on camera.
The teeth have definitely been it’s still. It’s still really sharp, but the serrations don’t have any points on them. Anymore, that’ll still slice right through this, not as cleanly these knobs are really really tough. That still feels ridiculously sharp. I think the serrated blade is going to be a lot harder to get dull. Okay, okay, you see that that’s pretty golf that was a full stroke of the blade and it just cut like an inch.
My expectations are very, very low. It won’t even oh there we go, we kind of got a little something, so it seems like the tip still kind of has some sharpness left to it, but the middle we gotta work on that tip just a little bit that thing, nice and dull. Okay, now now we’re just kind of shredding. It we’re good now now, with our dull knives just for fun see if we can see what kind of damage we can do to these water bottles.
I have a feeling that this is just going to be like a bat, and it’s just going to fly across the room wow. It was enough to rip the paper on the seal. That was it that was all it was able to do. Let’s try that again, I’m going to try to do like more of a slice motion. Oh oh, we caused a little just a tiny little tiny little pinhole. That gives you a good indication of how sharp it was to what it is now now.
It can just cause the tiniest little pinhole in a bottle of water. I think this one’s probably gonna be about the same story. I promise I did not slice that so, as you can see, all the water burst it out of the bottom. It definitely did not slice it. It just kind of acted like a bat and it had enough pressure to blow the bottom out of it, not just for fun.
Let’s see how bad these things are at cutting a tomato. Okay, it cut it. You want to be technical, it did cut it. Does that for how dull this thing is. That’s actually quite impressive: it’s not very thin, but I mean this thing is basically like a butter knife wow that actually kind of works. I mean it’s horrible, but I am kind of impressed where this one’s serrated.
It should do better if I just saw through it that actually does it’s not a good tomato slice. It just happens to slice it. It’s not too bad. Just out of curiosity, I said that I said that this one was like using a butter knife. So let’s use a butter knife see if we can cut it with a butter knife. I’m not gonna lie that wasn’t much worse. That wasn’t much worse than the uh than the mora.
The more was a little bit better, but a butter knife was almost just as good now, let’s sharpen these things see if we can get them back normal. Finally, the time that you’ve been waiting for it’s time, apparently time to actually sharpen a knife with this sharpener. So I don’t think I said this in the beginning, but obviously this has guards all you do is turn this thing on and then you’re just going to just drag the blade along either side of the guards so that it hits both sides of the belt and then sharpens both sides of the blade very simple.
What I’m going to do is I’m going to start a timer and then I’m going to start start sharpening, and then I want to see how long it takes to take this knife from completely dull to where it could like slice a piece of paper smoothly like it did before. So I’m going to start a timer and then we’re going to go three two one. So we’re only a minute 35 in and it kind of feels like we might already have a little bit of an edge back.
We do we’re hey we’re, not we’re not perfect, but we’re we’re doing pretty good, especially for only a minute and a half. So let’s keep going pause. This one thing I am noticing is that where this belt is spinning this way, whenever you draw the knife, whenever you’re putting the knife on this side, it’s it, you can kind of feel like it’s kind of lifting the knife up a little bit, so you can put just a little bit of downward pressure and then have it be just perfect, but then, on this side, where it’s rotating this way, whenever you put the knife in here, it kind of like pulls the knife down in there, and you can hear the motor kind of like bog down just a little bit and then it feels like it’s.
It just doesn’t feel like it’s like it’s working right, because it’s like sucking the blade down in and then you’re dragging the blade into this plastic down here. So I don’t think it’s gonna be a huge deal, just something. I’ve noticed all right. Three minutes in this. This, like back half of the blade right here, feels like it has a really nice edge on it yeah.
I need to work a little bit more on the front part of the blade, but that back part of the blade it’s not back to where it was, but it’s it’s got a really nice edge on it, which need to work a little bit more on this front, part of the blade. Okay, it’s been about nine minutes. I feel like that’s probably just about as sharp as it was. Whenever I pulled it, I reported out of the sheath for the first time oh yeah yeah, look at that we’re going to do all the other tests, but as far as the paper test under 10 minutes, and it’s pretty much right back to normal and I didn’t even hone it.
So if I really wanted to, I could take my time and go through here and actually hone it and probably get it like, probably even sharper than it was whenever I first got it for being under 10 minutes from not being able to cut anything to back to razor sharp. Again I mean that’s a win. This thing, this thing is the real deal. So since this one took just under 10 minutes, I’m going to assume that our serrated blade is probably going to take about the same.
So I’m going to go ahead and start the timer. Let’s get started the first problem that I’m noticing, while I’m doing this is just like just like. I said with the mora on this side, where it’s rotating this way on this side, it’s fine. It just drags along no problem, but on this side, where it’s rotating downwards, it’s wanting to pull the knife down in there and then the serration.
It’s wanting to pull the serrations down into the plastic. So it’s whenever, as I’m like trying to draw the knife back, it’s like like bouncing up and down with each each little serration bouncing over the plastic. So I don’t know how much of an effect that’s going to have it’s going to be a little bit annoying, but we’ll see should be just fine all right, we’re at pretty much the same spot where we stopped with the mora just under 10 minutes, I’m not gonna lie.
It doesn’t feel quite as sharp as the mora all right. Let’s see what we got here, hey, that’s that’s probably right about where it was maybe just a little rougher than what it was. I’m gonna go just a little bit more, maybe just like another two minutes or so, and I think it’ll probably be exactly right back where it was all right, we’re at roughly 11 minutes.
Oh that’s sharp! That’s really sharp! Oh yeah! We’re we’re pretty much right back where we were, and you remember before we started sharpening the this knife would just like rip cardboard. It wouldn’t even cut it yeah it’s back to pretty much what it was all right, but before we go any further, I need to tell you about the sponsor of today’s video ridge wallet.
I’m sure that most of you probably carry wallets around that look like this they’re old they’re, big they’re, bulky, they’re outdated. They are prone to collecting things that you don’t need, like change or receipts or pictures of your ex-girlfriend or whatever take this wallet, throw it away. That is where the ridge wallet comes in ridge has pretty much revolutionized the wallet they have shrunk it down to the size of a credit card, and it just so happens that it holds 12 credit cards, they’re very easy to take in and out just like this slide in or slide out slide in.
They also have a money clip on the back to hold your cash. They come in over 30 different styles. They have over thirty thousand five star reviews. These wallets actually have a lifetime warranty so that you can buy this one wallet and then you can carry it for life. If anything happens to it, you can get a replacement. Also, if you like this wallet but you’re on the fence of whether or not you’re gonna, if you’re thinking about buying it but you’re on the fence, whether or not you’re you want to buy one, you can buy this wallet and test drive it for 45 days, and if you don’t like it, you can return it and you can get a full refund.
So if you’re interested in one click the link in the top of my description, you just go tylertube and get 10 off. Let’s go ahead and do the most important test of them all make sure we can cleanly slice water bottles. I really think this is probably going to do, maybe even better than it did in the beginning. Don’t miss! I mean it sliced it. I don’t know.
If that’s that was the knife or if that was me, let’s try that again all right one two! It does not appear it’s slicing it open, but it does not appear to be slicing it as cleanly as it was before. I’m 99 sure that the knife just isn’t as sharp as it was, but I’m going to give it the benefit of the doubt. I’m going to try again all right, I’m gonna, go I’m gonna stay away from this label, go a little bit lower.
Okay, so well, it actually didn’t go lower, so it sliced it clean through, except for that little tiny bit right there. I don’t want to say that it’s. I don’t want to say that the knife isn’t as sharp because it slices so cleanly through, but it’s not cut in half like it was, and I would say that I’m doing the exact same thing as I was so maybe it’s just a tad bit more dull than it was not by a whole lot since that last, since the the morris seemed to be like just like 90 there, but not quite 100, of what it was doing.
This one could be the same thing. Okay, I mean it cut the top off, but the first time that I cut the top off. I cut it sliced so cleanly through that the bottom of the bottle did not move this time. It did cut the top off, but the bottle spilled over again, it’s probably like the more it’s probably about 90 of the way there that could probably easily be fixed by me just running it through the sharpener more and maybe honing the blade and getting it a little bit sharper.
So far, I’m still pretty impressed and now for the final and most important test, the tomato test so just like before we’re. Just gonna I can already I can already feel that’s way better before after we made it all dull and stuff, it was just pretty much crushing the tomato, oh, that’s, nice and thin. We need to get rid of, I think, get rid of that get off of me, get rid of this little green part of the tomato.
Oh look at it! Oh that was going so good. That bottom part was a little thick. Oh look at that. Oh that’s, paper, thin that might even be better than it was in the beginning. Oh look at that. You can see how thin that is. You can see the blade through it and everything yeah. I would say that that’s even that’s on par or better than what it was in the beginning.
So that’s pretty good. Let’s move on to the carving knife! Oh, I can just feel how sharp that is. That’s gonna, be if I get an even cut all the way through it’ll be perfect. Here we go messing it up again. Well there we go. Look at that, that’s so thin! You can see the blade through it. I honestly think that I can go and go thinner than that. Oh look at that that piece right there, that’s the one.
You can see how that ow. I have a little cut on my finger and as soon as that tomato juice got in that cut that started burning that felt like I had like a lighter on my finger, I didn’t think tomato juice would burn a cut. I thought tomatoes were good for you. Why are they trying to hurt me? No wonder I don’t eat tomatoes, tomatoes, suck and just to clarify, that’s a cut that I had before this video.
This cut was not because of this video, although I don’t understand why the tomatoes are trying to kill me alright. So my final thoughts on the work, sharp knife sharpener, I give it an a plus. I think it’s really good. I really like it. I’m especially impressed with how it was able to take these knives that were completely beaten down to nothing and grinded on a cinder block, wouldn’t cut warm butter and then bring them back to like 90 95 as sharp as they were when they were brand new and to do it and like this one under 10 minutes and this one just a little bit over 10 minutes.
I think that’s extremely impressive. If you’re looking for a knife sharpener- and you want one- that’s just quick and easy and you don’t need any skill to operate and it’s super easy to use. I would highly recommend this one. I will have the link to them in the description of the video and now just a couple more things that I know you guys are going to ask.
I know somebody’s going to ask if you can, if it’s only for knives or if you can use it, for something like a hatchet and I’ve heard I did try it and you can use this for a hatchet. The only problem is that, where the hatchet blade is so thick, you can fit it in here and it does sharpen it, but where it’s so thick it puts whenever you stick it in here it puts a lot of tension on this belt and then it really bogs down the motor.
But if you’re really light with it, it does work. So you can sharpen hatchets. With this thing, you can also sharpen swords. I tried. I did a couple passes with this sword and it’s honestly the sword. The sword kind of has the same problem as the hatchet, the blades just kind of a little bit too fat. So whenever you stick it in there, it kind of bogs the motor down a little bit, but if you’re just real light with it, it does just fine, and I also did a little experiment that didn’t quite work out.
I wanted to show how good this thing was with a butter knife, so I took a butter knife and I was going to sharpen it to be razor sharp just because a butter knife, everyone knows how sharp butter knife is. It’s not it’s completely. Dull and it won’t, it won’t actually cut anything. I figured running it through this thing would I could easily get it up to be like razor, sharp and while I did get it pretty sharp.
I think that the whatever super cheap steel, this butter knife is made out of. I think that this is just it’s too soft to get a really razor sharp edge on, because I within 10 minutes, I got it as sharp as it is now, and then I spent probably another 15 minutes just like going over and over and over. I even tried like honing it a little bit, and I just cannot get a razor sharp edge on this thing but, like I said, I think it’s because the steel is just like.
Who knows what kind of steel? It is just the cheapest chinese steel that you can think of, but I did get it kind of sharp. I was able to get a couple good slices on the pieces of paper yeah you can see. Apparently I hope you guys enjoyed the video. I hope you enjoyed watching me mess around with a knife sharpener and playing with knives. Thank you so much for watching.
If there’s anything else that you want to see me review like this knife, sharpener leave a comment down below and I’ll see in the next one. You.
Привет друзья на относительно недавно прошедшей выставке, одна, известная, компания, занимающаяся, производством, заточного, инструмента, и, заточных, вообще в целом, устройств, для, инструментов, и в том, числе для, ножи, представила, одну, очень, интересную, модель, новой, электрической, точилки, речь, конечно, же, идёт, о, компании work, sharp представителями, которых мы, являемся в россии, и давайте, посмотрим, что, же, такого, интересного, они, по, выпустили, вот, такая, вот, интересная, коробочка, приехала, нам, недавно, на, обзоры, на, тесты в продажу, к, сожалению, пока, она, не, поступило, как, и, широкое, производство, вот, это, новая, точилка, компании, варбург, sharp называется, на, combat knife, sharpener мы долго, ломали, голову, на, самом, деле, почему, компании work, sharp выпустила, к в продолжение; после модели ken onion до выпустила именно, вот, такую, о, чем, я, говорю, давайте, сейчас, посмотрим, данная, модель, она, пошла, на, максимальное, упрощение, то, есть, мы, вскрываем, что, мы, видим, мы, видим, пример, ремешочек, мы, видим, блок, питания, сама, точилка, и, переходничок, нашу, разит, там, еще, много, разных, бумажек, конструкции, об, этом, не, будем, компания work, sharp пошла, как, я, уже, сказал, на, упрощение, по, 1, простой, причине, создав, точилку, версии, кен, понял, они, сделали, инструмент, для, тех, кто, действительно, любит, своим, нажили, кто, постоянно, имя, работает, да, и кто действительно в этом, понимает и разбирается, версия, кино, лена, она, нет, не, то, чтобы, действительно, сложна в эксплуатации, или, же в киты, своих там, характеристиках, да, но, скажем, так, это, вещь, все, таки, для, людей, которые, разбираются, и, понимают, что, им, нужно, от, нажать, чего, они, хотят, от, своего, режущего, инструмента, и, заявкам, пользователей, компания work, sharp пошла, им навстречу и сделал такую, небольшую, за, точную, машинку, которая в общем, то, просто, до, безобразия, здесь, нет, никаких, регулировок, здесь, не, устанавливается, угол, как, кино, не, вам, здесь в общем, то, нет, практически, ничего, данная, точилка, оснащена, одной, простой, кнопкой, включили, съемный, вот, этой, вот, головой, до, у, которой, на, котором, уже, выставлены, углы, и, делается, это, все, для, того, чтобы, просто, напросто, взять, снять, ремень, и, поменять, его, меняется, все в общем, то, снимается, меняется, все, без, особых, каких-то, проблем, и, когда, я в первый, раз, увидел, данный, аппарат, у, меня, возник, вопрос, зачем, и, тут, же, сразу, приходит, на, память, практика, работы, нашего, магазина, когда, приходит, клиент, покупает, точилку, кино, не, он, благодарит, уходит, звонит, где-то, там, через, через, какое-то, время, и, спрашивает, а, есть, ли, что-то, попроще, там, скажем, просто, взять, на, кухню, для, жены, профессиональной заточки ножей на кухне да к сожалению, занимается, но, наверное, я, не, знаю, процентов, наверное, но, и, целых, 0, 0, 1, там, какая-нибудь, тысячная, да, во, всех, женщин, это, скорее, всего, это, шеф-повара в каких-то, действительно, хороших, ресторан, компаний work, sharp как, я уже сказал пошла навстречу своим клиентам и, выпустила, действительно, простой, универсальный, за, точный, инструмент, который, не, требует, вообще, никакого, знания, об, углах, о, формировании, режущей, кромки, о, состав, армирование, подвода, ничего, этого в этой, точилки, нет, есть, крутящий, элемент, вращающий, ремень, и, есть, маленький, небольшой, керамический, мусат, тег, для, уже, конечной, подвода, чки, ножа, или, там, грубо, говоря, просто, инструмент, стоит, на, кухне, вы, взяли, 2, там, посмотрели, там, немножечко, блестит, режущая, кромка, пару, раз, провели, достаточно, устранили, недостаток, все, пошли, дальше, резать, то, есть, эта, вещь, 1, боли, направлена, на, кухню, заточить, на, этой, машинке, кухонный, нож, ну, не, составит, наверное, никакого, труда, даже, для, ребенка в общем, то, механизм, работы, с, этой, машинкой, да, он, абсолютно, простой, давайте, включим в розетку, посмотрим, как, это, работает, дабы, не, быть, голословным, блок, блок, блок, подключается, сзади, вот, давайте, включим, теперь, посуде, посмотрим, как, это, работает, как, вы, слышите, машинка, работает, достаточно, тихо, в отличие, от, того же самого ken onion а вот, предыдущей, версии knife sharp у, народа это сильно тихий аппарат который, предназначен в общем-то, для работ на, кухне, давайте, откроем, по, песню, мы, тупому, посмотрим, как, вращается, элементы, [аплодисменты], действительно, достаточно, тихо, достаточно, не, быстро, да, то, есть, оборотов, здесь, значительно, меньше, даже, чем в первой, версии, электрической точилки at work, sharp но, опять, же, никому, никогда, спешка, и, скорость, они, не, давали, ничего, позитивного, до, касаемо, именно, работы, данный, аппарат, предназначен, как, я, уже, говорил в основном, для, заточки, кухонных, ножей, до, постольку, поскольку, здесь, имеется, фиксированный, угол, угол, примерно, где-то, ну, не, соврать, где-то, 20-25, градусов, на, сторону, датой, где, то, 40, 50, градусов, как, действительно, альтернатива, каким-то, ручным, за, точным, инструментом, на, кухню, каким-то, мусатом, да, это, действительно, очень, хорошая, альтернатива, часто, задаваемый, вопрос, да, когда в первом, когда в первый, раз, на, только, при, приехала, к, нам, все, наши, сотрудники, стали, интересоваться, какова, цена, цена в россии, на, данный, аппарат, будет, равнятся, порядка, beta 5, с, половиной, теряет, 7, 7, 500, ответа, примерно в этом, районе, то, есть, сша, это, точилка, стоит, порядка, 100, долларов, что в общем-то, для, такого, аппарата, да, это, недорого, говоря, о, расходных, материалов, да то есть в таких, вещах расходные материалы как правило бывают и камень, преткновения, да, и, вопрос, для, долгих, диспутов, хочу, сказать, сразу, ремешки, от, предыдущих, точилок, от, компании work, sharp одни, подойдут на данную модель здесь используются ремешки тоньше и меньше, по, диаметру, соответственно, ремешочки, здесь, по, крайней, мере, то, что, пришло, к, нам в пробной, версии, на, это, только, один, вид, это, примерно, давно, это, достаточно, грубые, ремни, да, и, примерно, где-то, по, зернистости, здесь, ну, где-то, порядка, 400, там, 300, 50, 400, грид, будут, ли, дальше, выпускаться, ремешки, более, мелкой, или, более, крупной, зернистости, к, сожалению, пока, информации, такой, нету, скорее, всего, будут, как, она, две, предыдущие, модели, это, мы, будем, ждать, информацию, эту, будем, смотреть, будем, тестировать, данный, аппарат, и, это, только, первое, видео, с, ним, дальше, будет, интереснее, посмотрим, как, он, работает, посмотрим, да, какой, кондиции, можно, заточить, даже, самые, убиты, на, кухне, нож, из, самых, дешевых, материалов, возьмем, кроме, советский, старый, ножек, там, выкованный, из, из, напильника, из, человек, такого, очень, твёрдого, посмотрим, как, поведет, у, нас, себя, с, такими, ножами, и, еще, хочу, добавить, что, если, кого, то, данная, моделька, заинтересовала, мы, открываем, пред, заказ, на, данной, модели, то, есть, вы, все, что от вас требуется это позвонить по, телефонам, указанным, на, нашем, сайте, и, оставить, предзаказ, на данную, модель q, которая должна поступить в продажу, ориентировочно март, апрель, 2017, года, мы, я, думаю, вполне, сможем, если, будет, достаточно, большой, интерес, мы, сможем, даже, провести, какие-то, мастер-классы, по, работе, с, за, точным, инструментом, слова, фирмы work, sharp и, будем стараться отвечать по максимально все ваши, вопросы, касаемые, до, данного, устройства, устройств, предыдущего, поколения, и, если, возникают, какие, то, вопросы, не, стесняйтесь, звоните, пишите, нам, наши, специалисты, готовы, рассмотреть, все, ваши, вопросы, пожелания, и, с, радостью в ответить, на, них, всем, спасибо, за, просмотр, надеюсь, вам, понравилось, нажмите, внизу, лайк, вот, можете, сжать, также, дизлайк в общем, ваше, мнение, для, нас, очень, важно, пишите в комментариях, что, вы, об, этом, думаете, где, мы, будем, стараться, совершенствоваться, всем, спасибо, всем, пока,.